Getting great sounding vocals is crucial for any recording project. Proper vocal compression can take your vocals to the next level by evening out the dynamics, adding punch, and creating clarity in the mix. In this post, I'll walk you through the basics of vocal compression, the best practices for setting compressor parameters, how to avoid common mistakes, and my go-to vocal compression techniques for radio-ready results.
With the right approach, vocal compression doesn't have to be complicated. Whether you're recording vocals at home or in a professional studio, these tips will help you compress your vocals like a pro. By the end, you'll have a solid understanding of compression settings, have actionable steps to start dialling in pro vocal compression, and know how to avoid the pitfalls of over-compression. Let's dive in and take your vocals to the next level!
Want to learn more about compression? Check out our complete guide to compression below.
So you've been told by everyone that you need compression in your mixes, and ultimately on your vocals. But why do we do this?
Improve Consistency and Control Dynamics
One of the main goals of vocal compression is to even out inconsistencies in a vocal performance by lowering the dynamic range. Singers naturally fluctuate their vocal volume, often going from loud to soft in a short span. Compression helps to smooth out these peaks and valleys so the vocal sits more consistently in the mix.
The compressor evens out the louder and softer parts, bringing up quieter passages and gently attenuating louder passages that stick out. When the vocal goes above the threshold, it will turn down the loud parts. This makes the vocal sound tight and controlled. The result is a more polished and professional vocal sound.
Add Clarity and Presence
Compression can add clarity to vocal performances by bringing up subtleties otherwise lost in a mix. Boosting lower-level vocal nuances makes the lyrics more intelligible and helps the voice cut through a mix.
Subtle compression can also add a sense of proximity and intimacy to a vocal. This phenomenon works great on ballads and acoustic material where a closer, more present vocal sound is desirable. The compressor brings out texture and detail in the voice for a more engaging, emotional delivery.
Blend with the Mix
Compression can also help blend vocals by allowing them to sit better in the pocket of a mix. Getting the vocal to gel with other elements like guitars, piano, and drums often requires compression to anchor the voice in the overall balance.
Bring Out a Performance
Adding compression to vocals can help bring out a performance. With the right settings you can emphasize words, deliveries and pronunciations.
Vocal Chains
Everyone is always looking for the perfect vocal chain, but heres the secret...there is none. Every song is different, and will need different processing. Sure most engineers have a vocal chain that they stick to, but things often get moved around and swapped out.
Once you get the feel for a compressor and it does what you are looking for, then you will tend to stick to it, especially if you know exactly how to use it.
In the end, they all do the same things, and you shouldn't rely on a specific plugin or hardware unit.
Before diving into common vocal chains, you should understand the signal flow within your session.
Signal Flow
Your vocals will go through multiple compressors and volume controls throughout the mixing process. Understanding how each step effects the next is necessary to achieving professional quality vocals.
If you want to learn more about "Gain Staging" and "Signal Flow", you can check our blog post about it below:
Your vocal chain will have these steps of volume control:
Input Level
Clip Gain
Inserts
Fader Volume
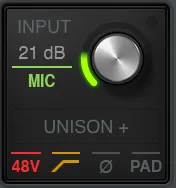
Input Level
This will be your first step in volume and dynamic control for a vocal. I suggest recording for peaks to hit up to -9dB. Getting a good level set for your vocals going into your system will greatly increase their quality.
Good vocal performances also start with the artist knowing how to properly sing into a microphone. Poor volume control happens when artists move away from a mic, or they have their microphone places poorly.
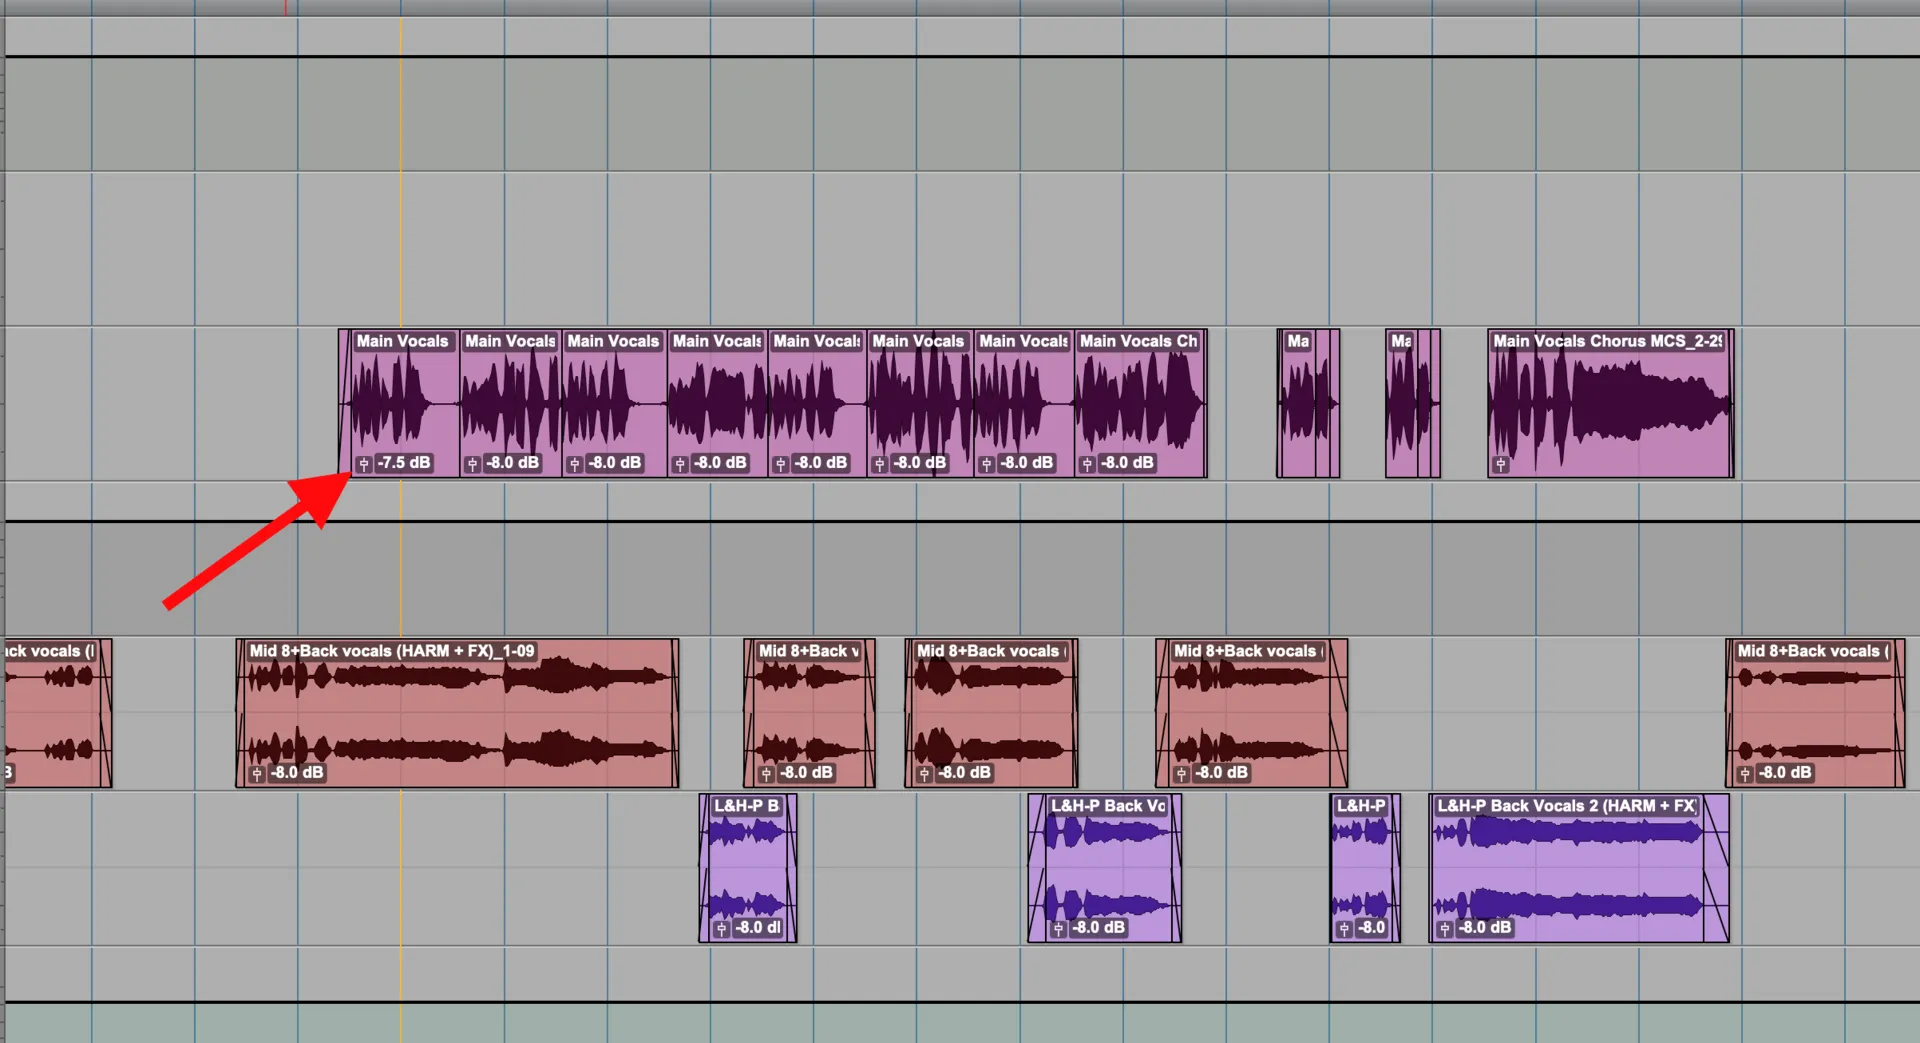
Clip Gain
The next step will be your clip gain. This is done very easily on your DAW's Edit window. Clip gain effects your clip or waveform, and happens before you send it into your inserts.
Any volume changes made at this stage will then effect how your compressors react. keep this in mind.
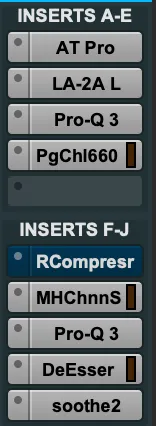
Inserts
This is where you will be adding your compression settings. Everything done before this step and all plugins before your compressor will effect how the compression is added to your vocals.
Fader Volume
This volume control is always post inserts in Pro Tools, unless your track is a master fader track. This track type is pre inserts.
Depending on how your vocal is routed, make sure to be weary of where you are sending your tracks as raising or lowering a tracks volume will effect any additional processing down the line.
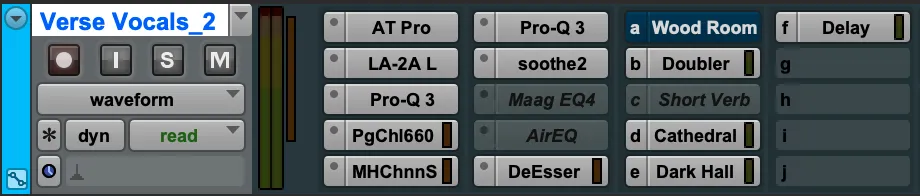
Common Vocal Chains
When it comes to vocal chains, you will 90% of the time be using EQ and compression. For my personal taste, I like to compress before I do any major EQing.
If you have hardware available it is encouraged to record vocals with the hardware, as it will sound best. When I do not have hardware available, I tend to use atleast one compressor directly on the vocals before sending it to any group or buss track.
This way there is more dynamic control going into the next compressor, and having overlapping tracks doesn't change how that next in line compressor is hit.
Here is how most of my sessions will look like
Pitch Correction
Compressor
EQ cutting low frequencies
Compressor for Color and Shaping
Compressor for Smoothing
EQ
Deeser
Automation
I will go over what each of the compressors do in this chain.
First Compressor
This compressor will be doing quite a lot of the heavy lifting and dynamic control. This compressor will usually be hitting around -5dB to -10dB of gain reduction. Again I try to keep this on individual tracks or printed on rather than through a bus or group.
Second Compressor
I usually have this compressor hitting around -3dB. The second compressor in my chain will be to emphasize a performance and add some color.
Third Compressor
This compressor is used to help smooth out the vocal and only does -3dB to -6dB gain reduction. I like to use something like an RComp for this.
Deeser
Deesers are also dynamic controls, I like to keep this for the end after all other processing. Deesing too much can make the vocalist sound "lispy", so in addition to the deeser, I will reduce esses manually on the tracks volume fader.
Automation
These compressors are not mainly used to have a loud and consistent vocal. A lot of what the compressors are doing is some sort of sound design and shaping. I like to manually raise or lower each word through a performance to help with hearing everything.
This way you don't over compress and you can really help shape the vocal performance.
What Are Good Compression Settings For Vocals?
Choosing what your vocal compressor settings will be, depends on the vocal performance, genre and the sound you are going for.
Want to learn more about compressor settings and how they effect your sound? Check out our blog posts below:
For the first two compressors I like to use settings that focus on the performance.
Staccato Vocals - Slow Attack & Quick Release
Legato Vocals - Medium Attck & Quick Release
The last compressor will have setting that help smooth the vocals out
Smoothen Out Vocals - Medium Attack & Medium Release
These settings will change based on how the vocals sound. It is always best to choose what sounds best and natural to the song, then be dead set on these values above. They are general settings and starting points. Use your ears.
Compressors also sound different and react differently, even with the same settings, so choose the right one for you.
How Do You Know If Vocals Are Over Compressed?
One of the last things you want to do in a song is over compress your vocals. You don't need to be brick-walling your vocals to bring the out in the mix. Try to hit a few dB per compressor.
Heres what you should listen for:
Listen for a Loss of Dynamics
The number one red flag of over compression is a loss of natural dynamics in the vocal performance. Singers express emotion through fluctuations in vocal volume and intensity. Over compressed vocals sound very flat and one-dimensional, almost like the singer is monotone. The compressor is working too hard to smooth out dynamic variations.
Check for Audible Pumping and Breathing
Another sign of over compression is audible artifacts like pumping and breathing. Pumping happens when the compressor noticeably ducks in and out in response to the input signal. This sounds unnatural. Breathing refers to the noise floor of the vocal track raising up and down in between sung lines, which can be distracting.
If your vocal sounds good, and you still have some noise, you may just need to do some manual editing of your clips. A ton of vocal processing is done manually. Clip gaining, cutting out noise, fades, etc. so don't over look it.
Watch for Loss of Attack and Clarity
With excessive compression, the unique attack transient on vocal lines gets squashed. This removes much of the crispness and clarity from the voice. Consonant sounds like s, t and ch will be harder to decipher. The vocal loses its ability to cut through the arrangement.
What Are The Best Compressors For Vocals?
Here are some of my favourite vocal compressors, I will add vocal compression settings starting points as well and where I position them in my chain.
First Compressor
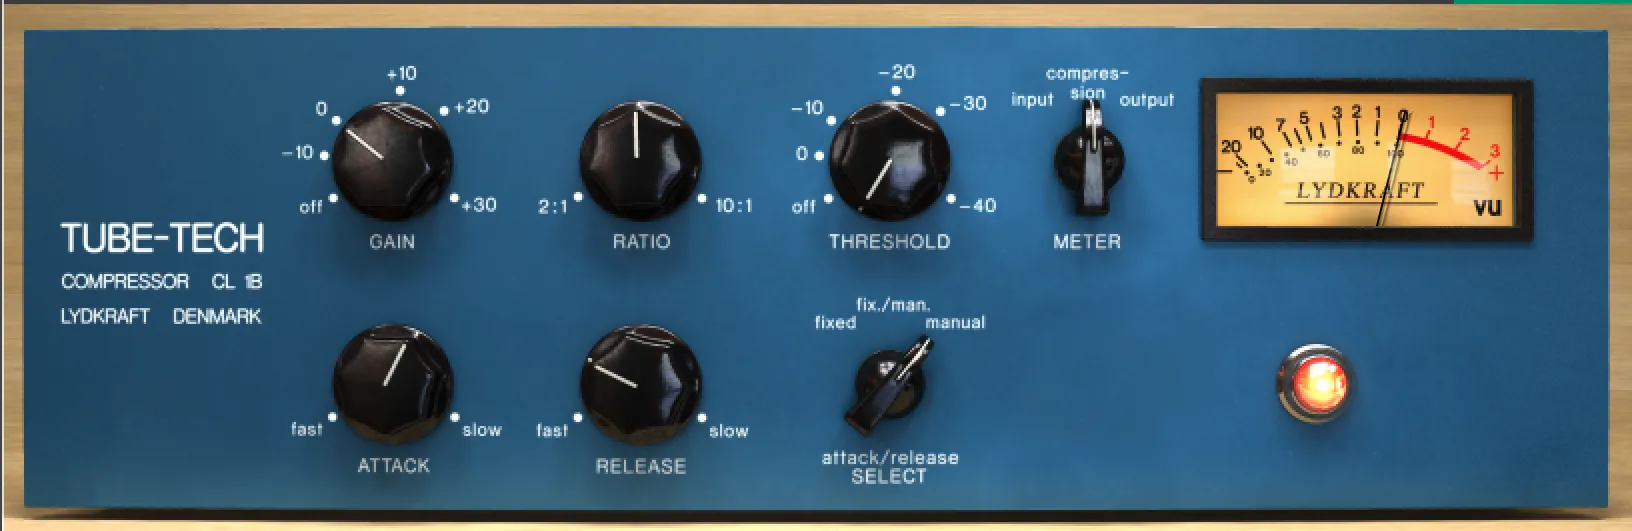
Tubetech CL 1B
CL 1B is one of my favourite compressors. You can really quash your vocal with this and it will still sound great. It is one of the most common vocal compressors, especially in hip hop.
CL 1B sounds great in both manual or fixed. Manual you choose the settings and in fixed they are pre set for you. use your ears to determine which one sounds best.
Gain Reduction - -3dB to -7dB
Ratio - 2 to 5
Manual
Staccato Vocal - 6 Attack and 3 Release
Legato Vocal - 4 Attack and 3 Release
Fixed
Attack time - 1 millisecond
Release time - 50 milliseconds
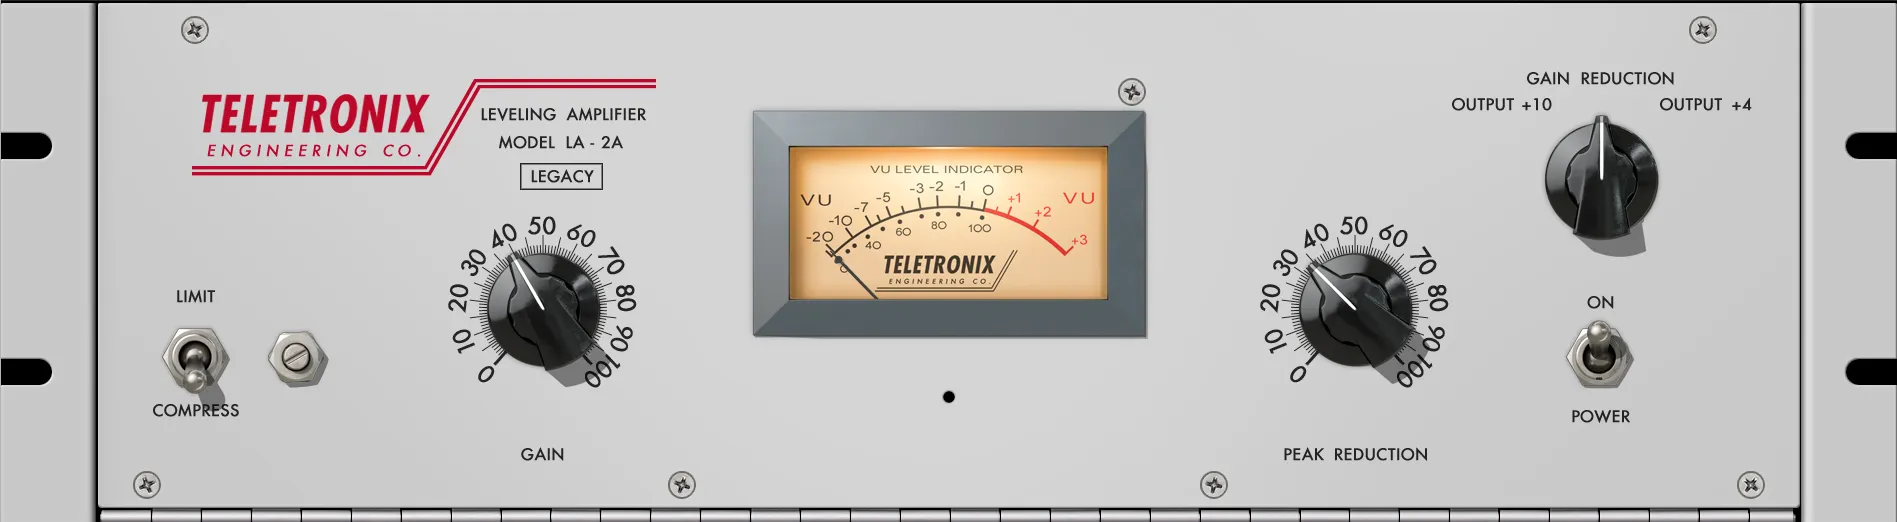
LA-2A
La-2a is one of the most transparent vocal compressors you can use. It sounds great with nearly any voice.
The La-2a is one of the easiest compressors to use. It has 2 knobs to use, Gain and Peak Reduction. Turn your peak reduction knob until it is compressing your vocals with the right amount for the performance.
Gain Reduction - -5dB
Any loss of gain can be made up with the gain knob.
Second Compressor
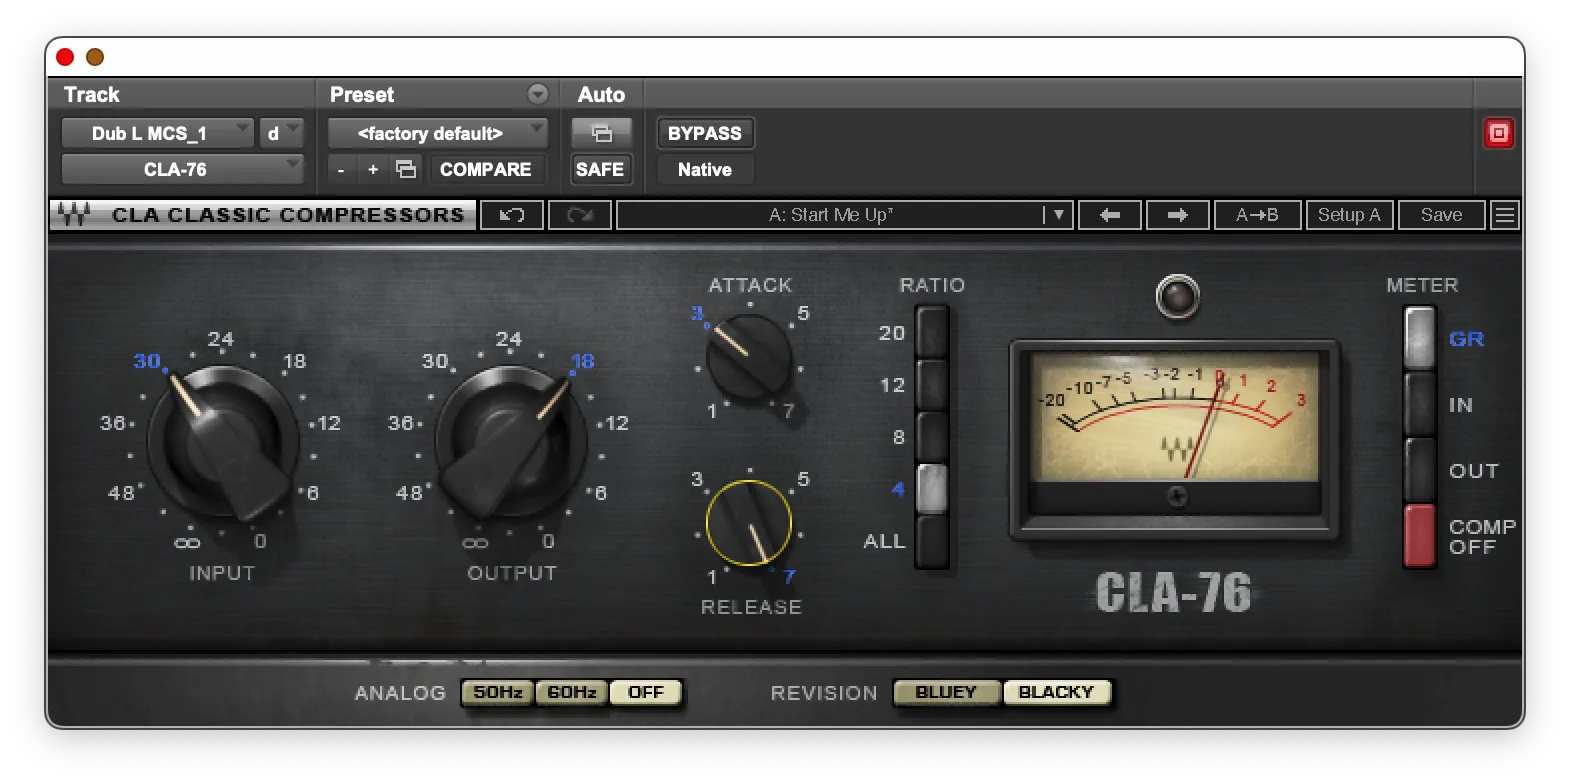
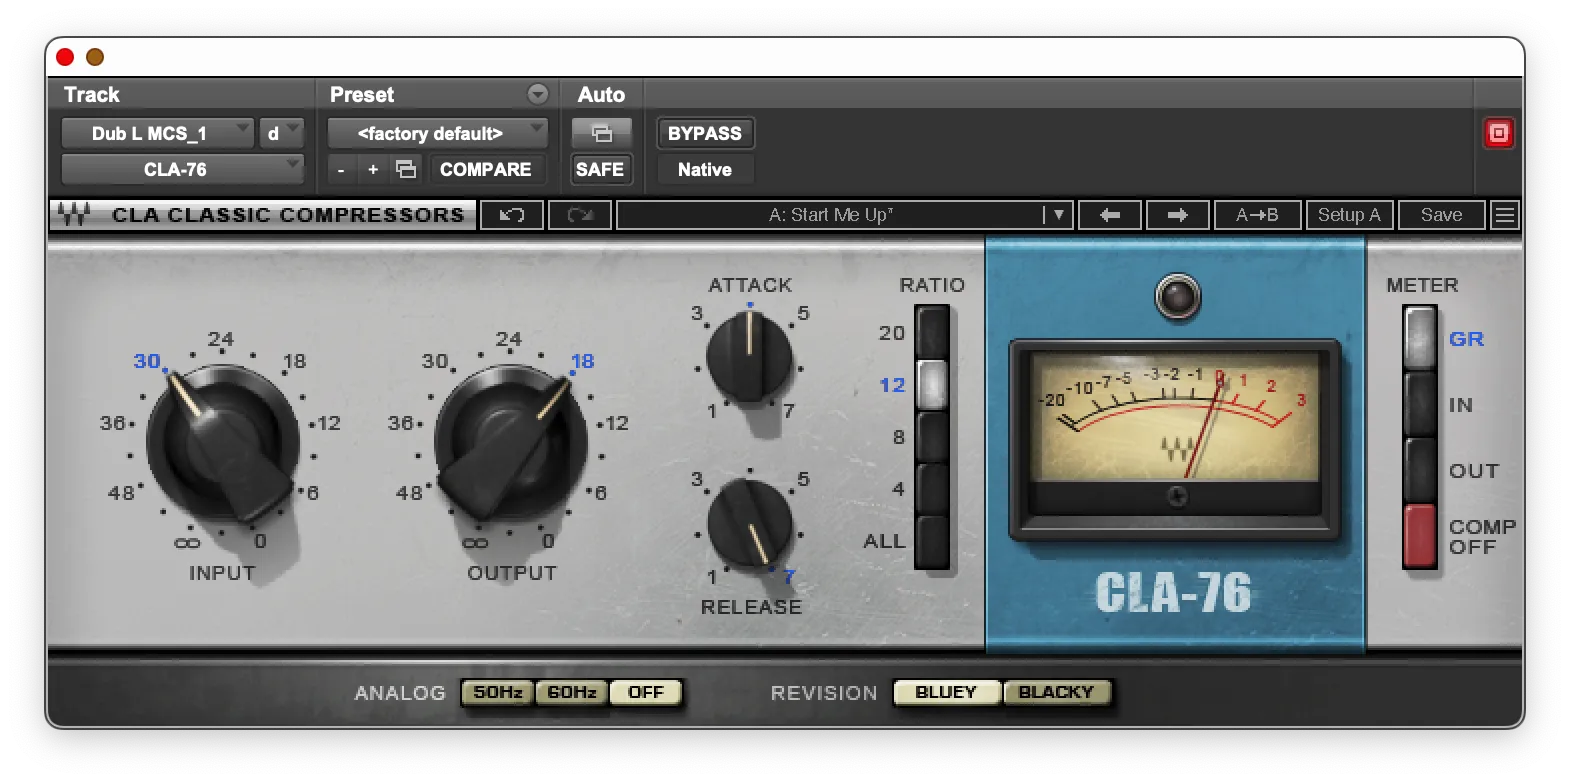
1176 Black
The 1176 Black is a great compressor to add color with and it's very quick response time is great for shaping a performance. I used to not like this on vocals but now it is one of my go-to's.
Gain Reduction - -3dB
Ratio - 4
Staccato Vocals - 4 Attack and 7 Release
Legato Vocals - 5 Attack and 7 Release
I tend to automate the attack on the this compressor throughout the vocal performance.
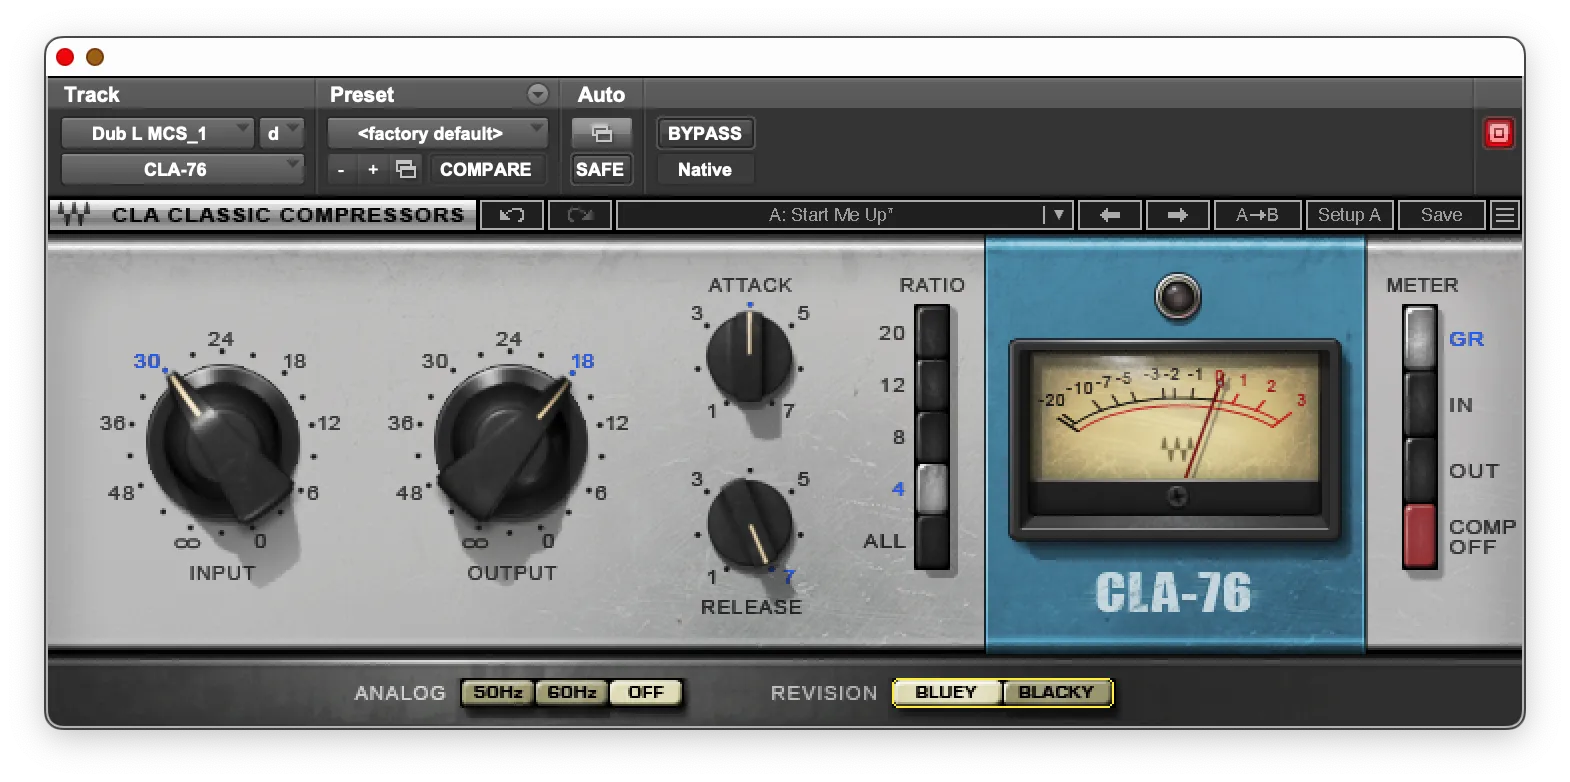
1176 Blue
The 1176 Blue is a great option if you want aggressive vocals. I also think the color it adds is brighter if that is what you are going for.
Gain Reduction - -7dB to -10dB
Ratio - 4
Staccato Vocals - 4 Attack and 7 Release
Legato Vocals - 5 Attack and 7 Release
Fairchild
Fairchild compressors have some great character to them. If the 1176 is not sounding the way I want it to and I want some color, this is next in line.
Gain Reduction - -3dB
Time Constant - 1-3
Gain Match
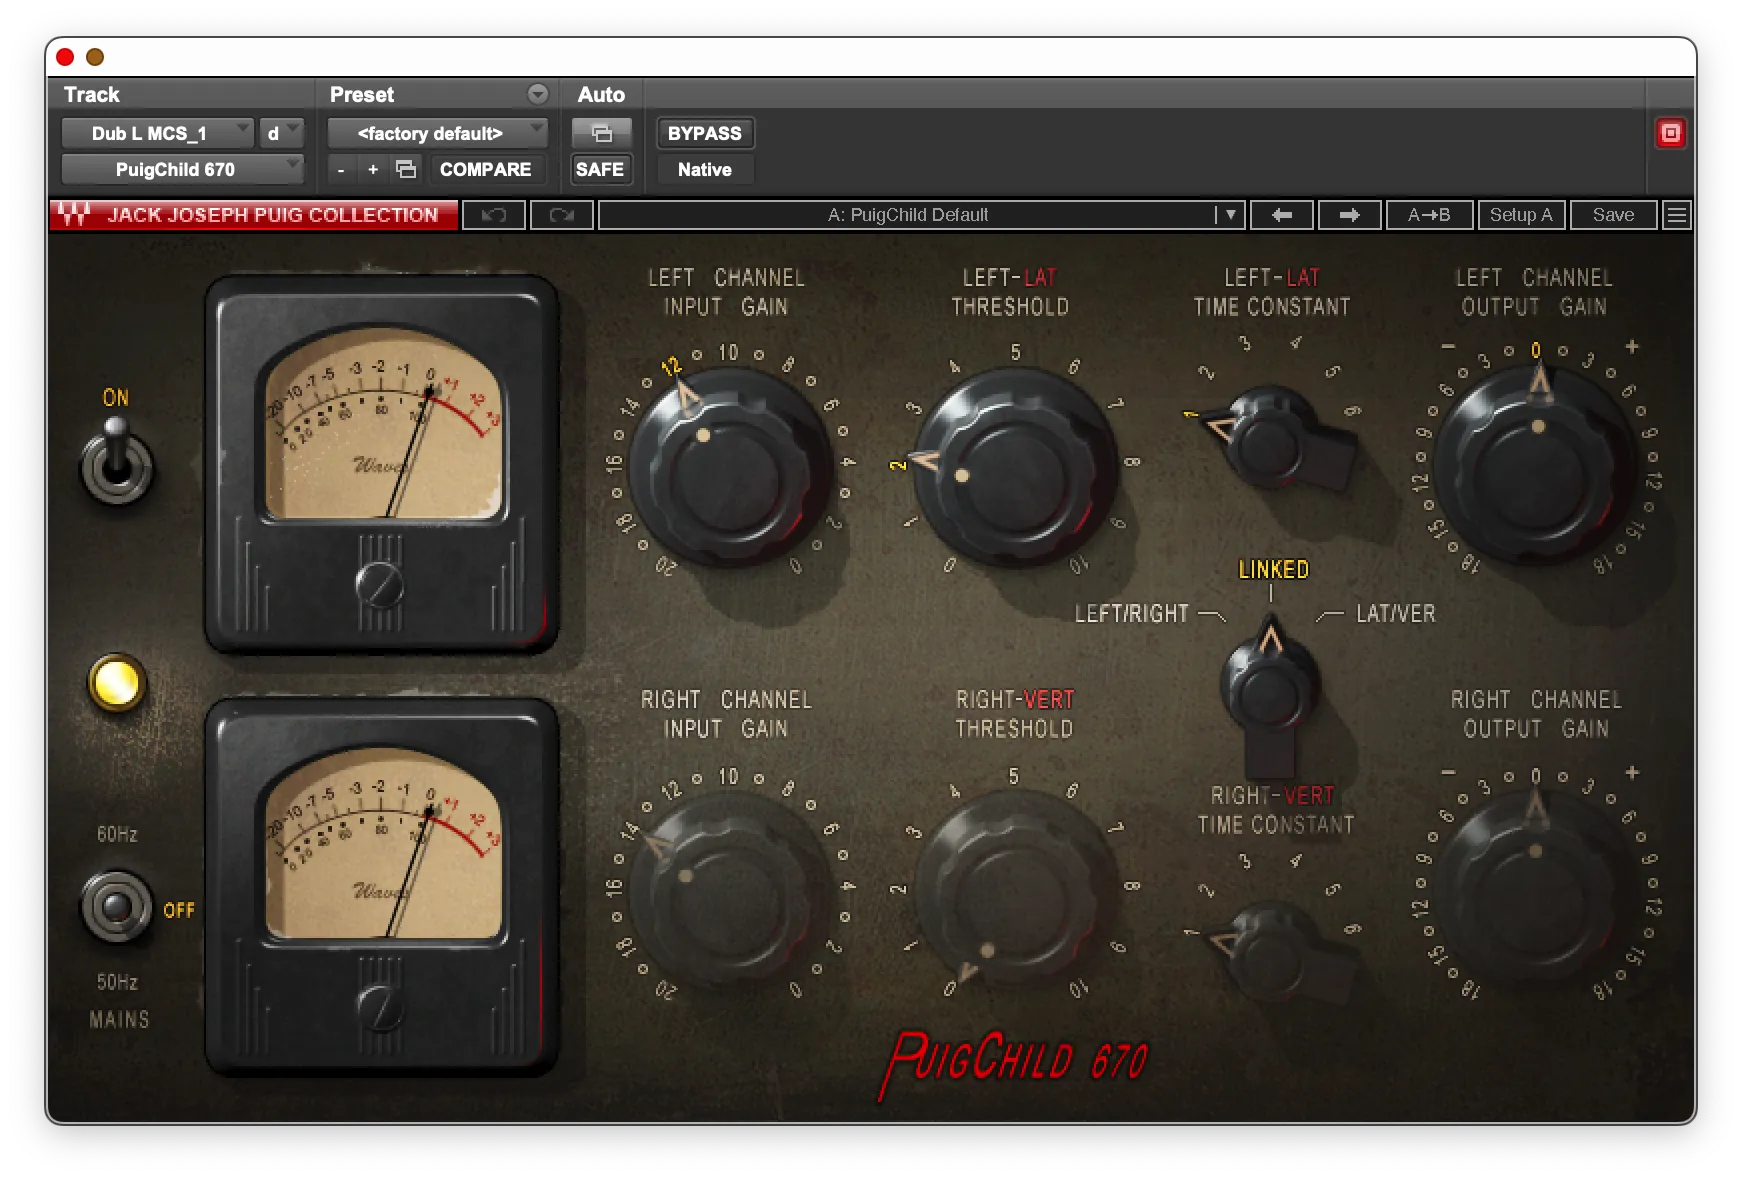
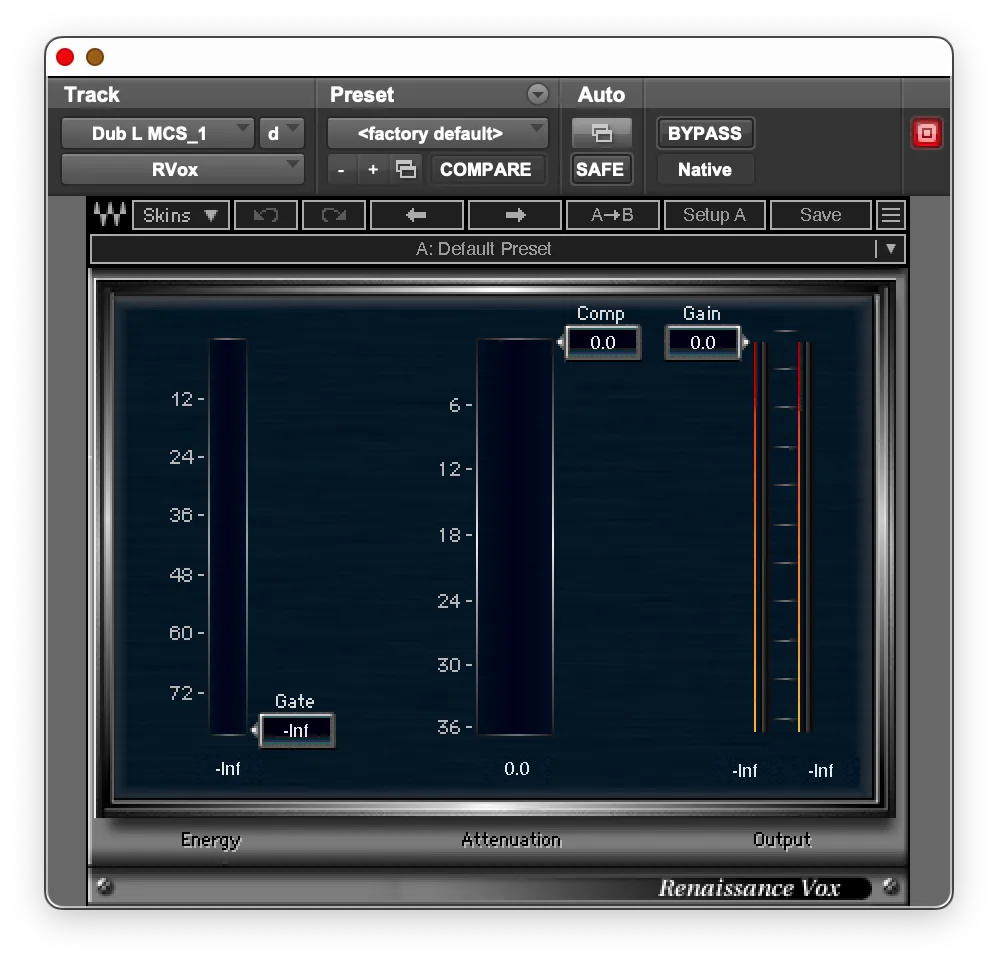
RVox
If you are looking for a compressor that really pushes the vocal forward, this is it. If I am looking for that really in your face sound the RVox is a go-to.
The settings change quite a bit for me, i never really look at what the gain reduction is and tend to just use my ears.
Gain Reduction - -1dB to -6dB
Third Compressor
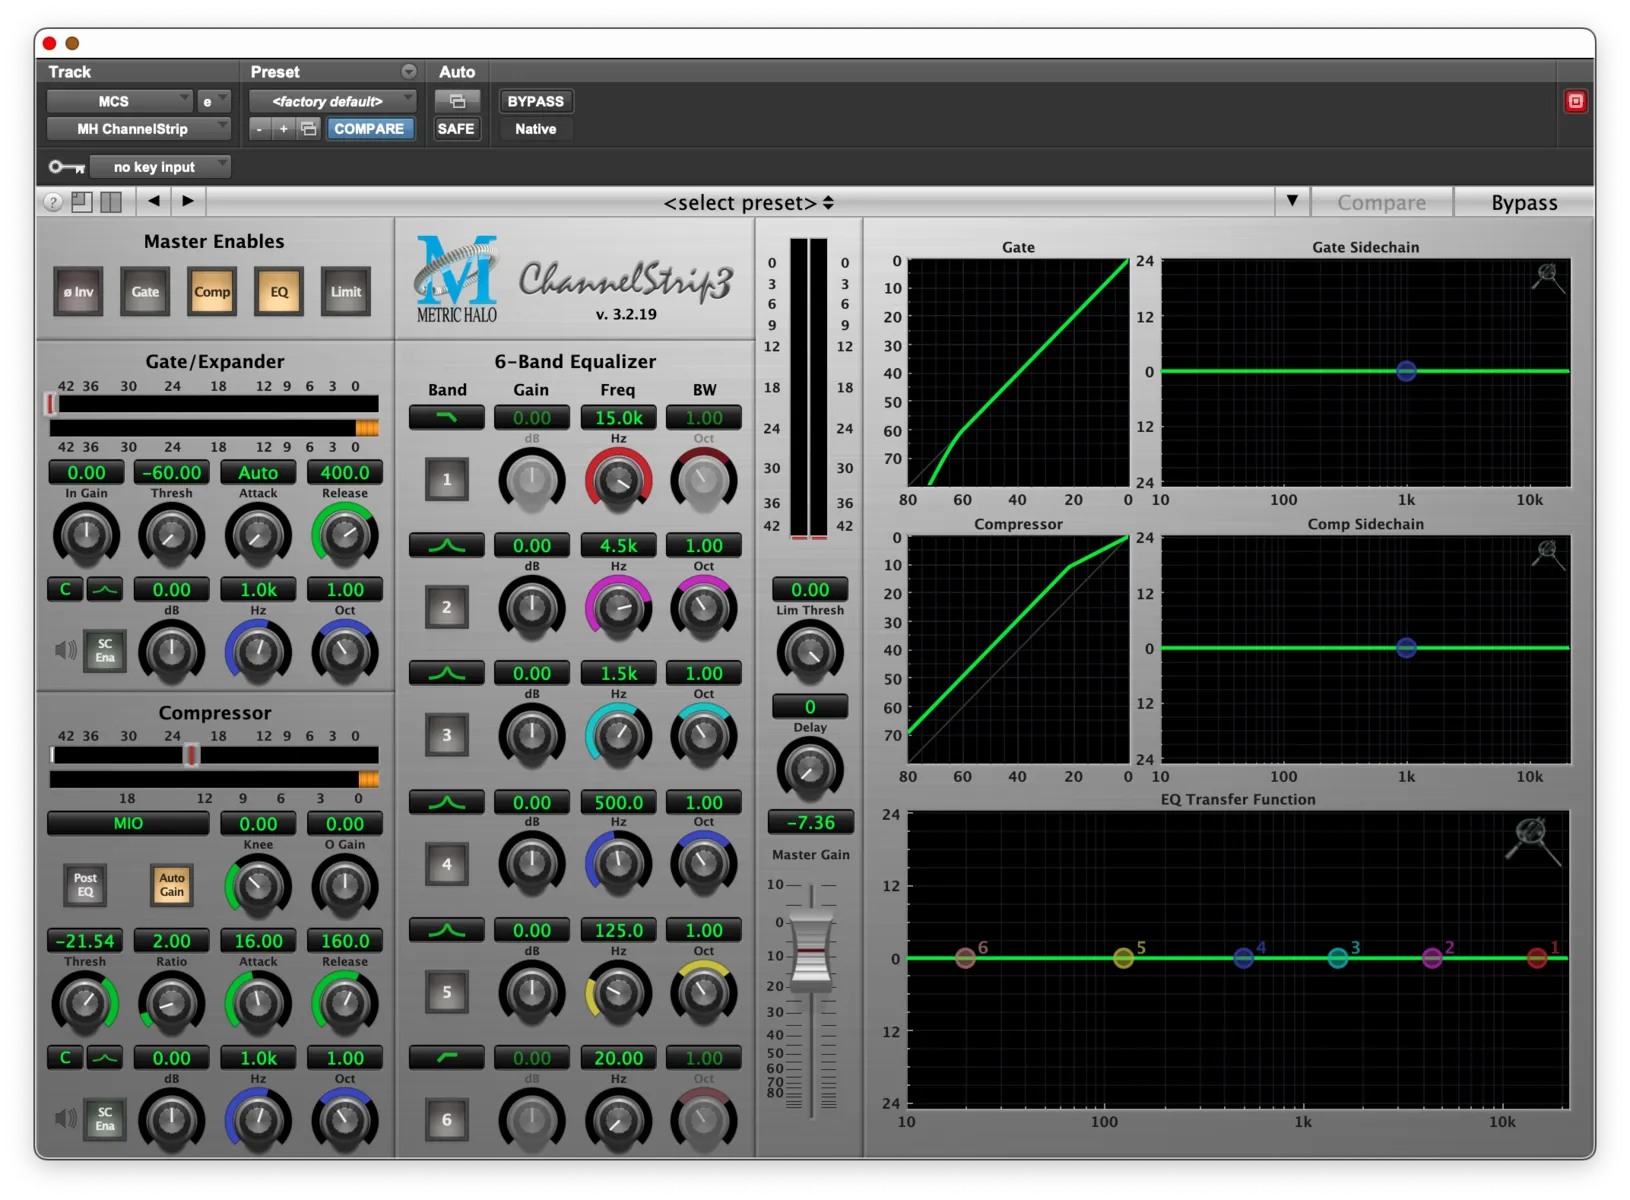
Metric Halo Channel Strip
This channel strip has one of my favourite compressors ever. There is no other SSL emulation that sounds like this one does. It is by far the closest thing I have found to a real SSL. Since getting it there has't been a single mix I haven't used it on.
MIO Setting
Gain Reduction - -3dB to -6dB
Ratio - 2
Attack & Release - Medium
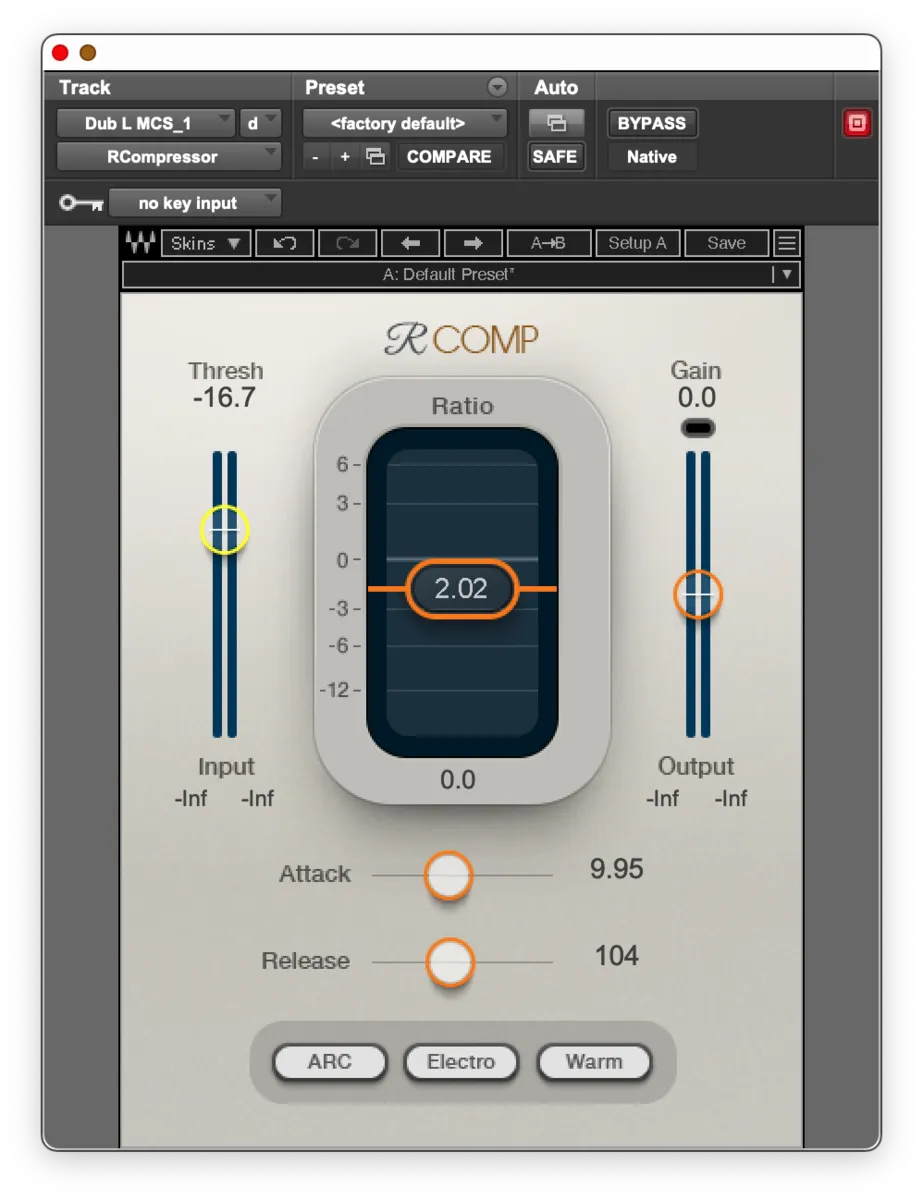
RCompressor
The RCompressor is another one of my favourite compressors for smoothening out a vocal. This compressor has some color to it too.
Gain Reduction - -3dB to - 6dB
Ratio - 2 to 4
Attack & Release - Medium
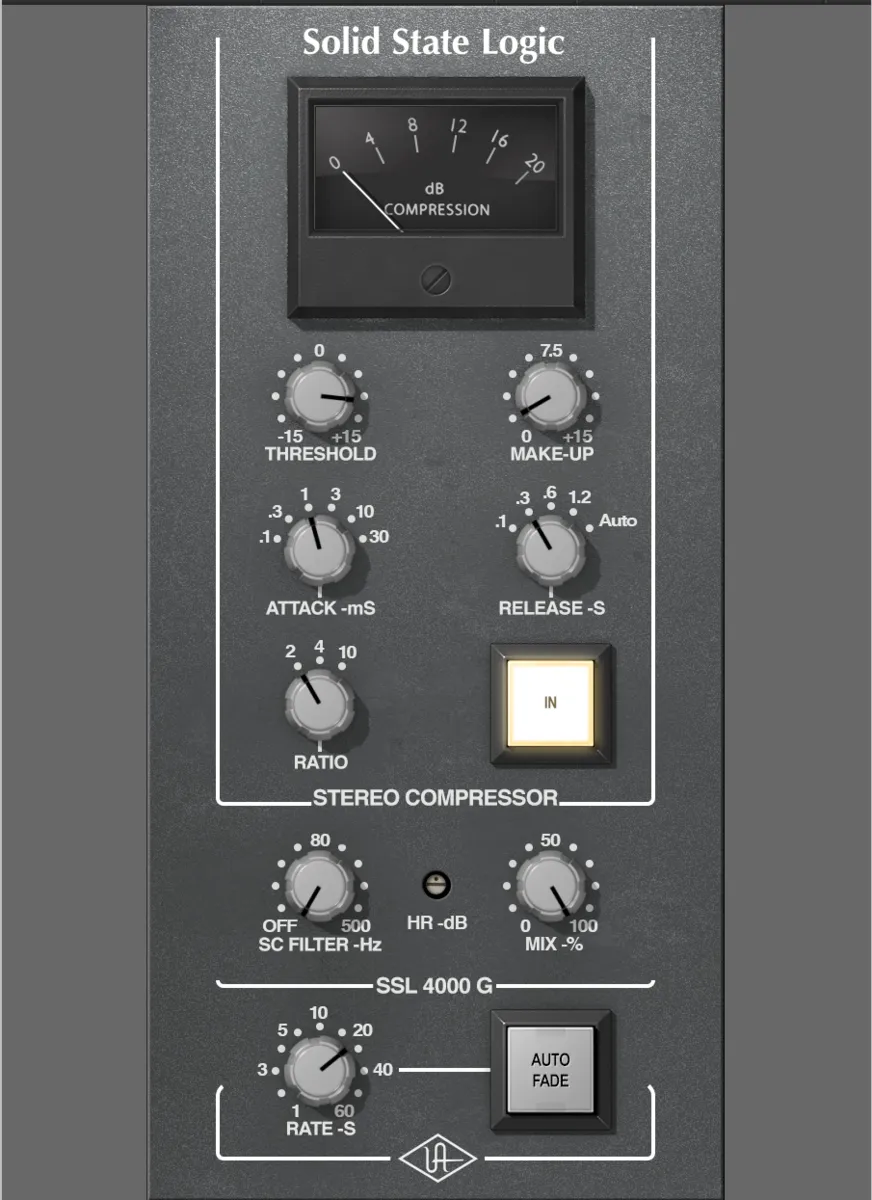
SSL Bus Compressor
I really love this compressor, it can do anything. It is very transparent. I like to use this compressor for extra shaping, I think it can really bring a performance out.
Gain Reduction - -2dB to -4dB
Attack - 1 to 10
Release - .1 to .6
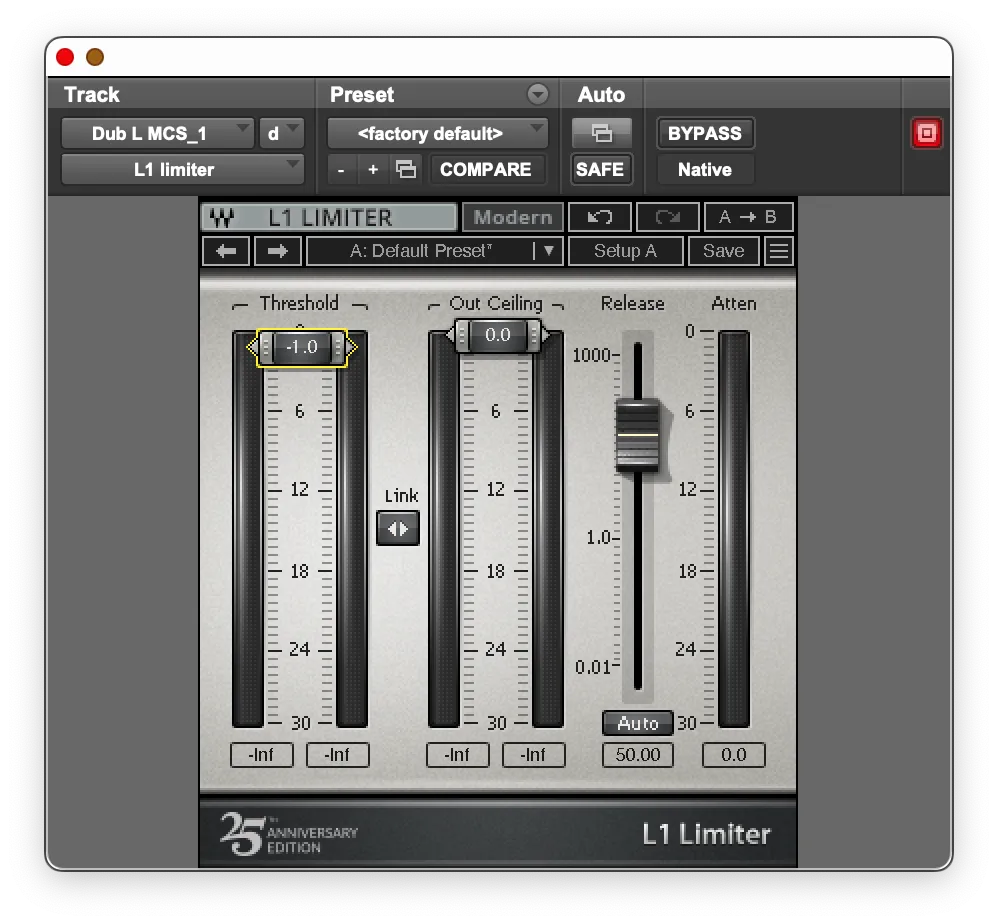
L1 Limiter
I wanted to include a limiter in this section, as depending on your genre or chain you may want to add one.
L1 is the only limiter I have extensive use of on vocals. I really like how much it adds to compressing and enhancing the top end of vocals. You can either slam this and lower the gain to match, or just put it on lighty for some top end enhancement.
Gain Reduction - -0.1 dBs to -6dbs
Release - 1 or 50
Parallel Compression
Parallel compression is a very common technique used to thicken a vocal. I have stepped away from using it as of late, but will include this section for those looking to implement it.
Parallel compression is a technique where you have a duplicate of your vocal, one heavily compressed that is then blended in with the original. This is a great way to add texture to a vocal, make it more consistent and also to thicken it up.
Want to learn more about adding and applying parallel compression to your mixes? Learn more about it below:
If you want to add parallel compression I would suggest using an aux send.
My parallel compression chain looked something like this when I used one:
1176 Blue
Attack - 4
Release - 7
Ratio - 12
Gain Reduction - -10dB
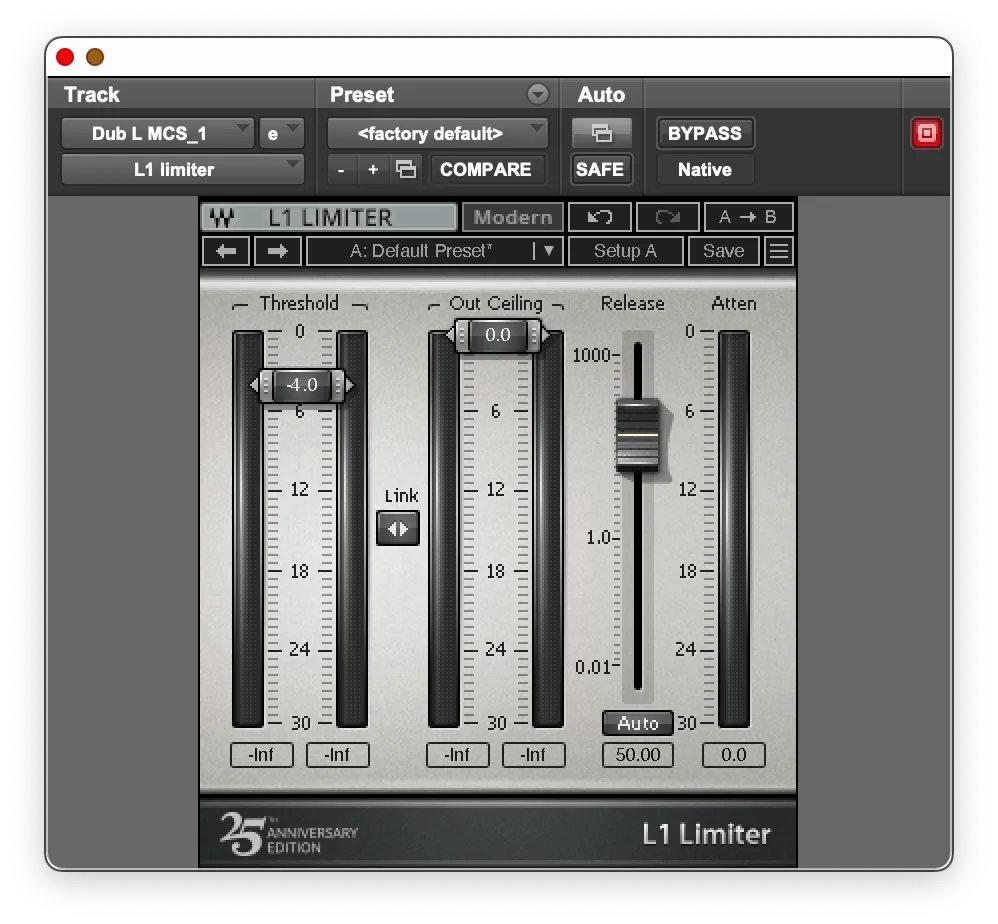
L1
Release - 50
Threshold - -4 dB
This way the parallel compression is really in your face, with the L1 getting all those crazy peaks, while also compressing the top end.
Multi-band Compression
I don't tend to use any multiband compression on my vocals as I am not that into the sound it gives. Seems un natural to me. The only use case I have found is to get real problem areas with targeted bands. This is often horrible sibilant problems or a bad proximity effect. I don't think there has ever been a time I used every band on a multiband for overall compression on a vocal.
Conclusion
To sum up the process, when first compressing a vocal, do some heavy lifting with the first compressor. The second compressor later in you chain should be used to enhance the performance and maybe add a bit of color to your vocals. The third is serial compression used to smooth out the vocal. Dessing comes last in the chain of inserts. The final step to getting professional quality vocals is manual vocal rides to bring out the performance.
Vocal compression may seem complicated at first, but have no fear - consistent practice with the techniques covered in this post will have you compressing like a pro. The key is to learn your compressor inside and out and train your ears to listen for the subtle results of your parameter tweaks.
Start conservatively, focus on smooth transparent compression, and you’ll be surprised how easy it is to get radio-ready vocal sounds. Just keep in mind the core goals of compression - tightening and controlling dynamics, adding clarity and presence, and helping the vocal sit in the track.
Thanks for reading - now get to coaxing the absolute best out of your next vocal track with these pro techniques! Let us know about your compression breakthroughs and how your vocals benefit from these tips.