Equalizing (EQing) your vocals is one of the most important parts of mixing music. Getting your vocal EQ right can make the difference between a professional sounding mix and an amateur one. When i first started mixing, learning how to EQ a vocal properly without compromising the quality of the recording was the best thing that could have happened to my mixes. I always thought "how do professional engineers mix their vocals so clean?". After mixing thousands of songs and talking to hundreds of producers and engineers, here are the best tips and tricks I have found to work.
I'll go over choosing the right EQ plugins to applying surgical EQ moves. I'll break down vocal EQ into simple, actionable steps you can follow to carve out space for your vocals, make them more audible and clear in the mix, de-ess harsh sibilance, and get your vocals sitting perfectly in the frequency spectrum.
Whether you’re a beginner looking to learn more about music production or a seasoned producer wanting to brush up on techniques, this step-by-step vocal EQ tutorial will give you the best vocal eq tips to achieve a professional sound.
Want to learn more about EQing? Check our blog post about everything you need to know about EQ:
When EQing vocals the most important thing will be the quality of your vocal recording. Not every vocal track needs the exact same EQ structure, especially if they are poorly recorded. The better your vocal is recorded, the less you will need to EQ. So before anything, make sure you are recording properly and in the right environment. Again, if you have poorly recorded vocals, these EQ tips may not help, and you may need to do more to compensate.
Male and female vocals also need different EQ. A male vocal will probably need more attention in the lower frequencies while female vocals need more attention in the upper midrange frequencies.
In the end using your ears and doing what is needed will benefit you the most. You don't need to copy these exact eq settings, they are just general ranges I tend to make eq moves in. Think about each section as frequency ranges you need to tackle to achieve a better vocal sound.
Step 1: Roll Off The Low End
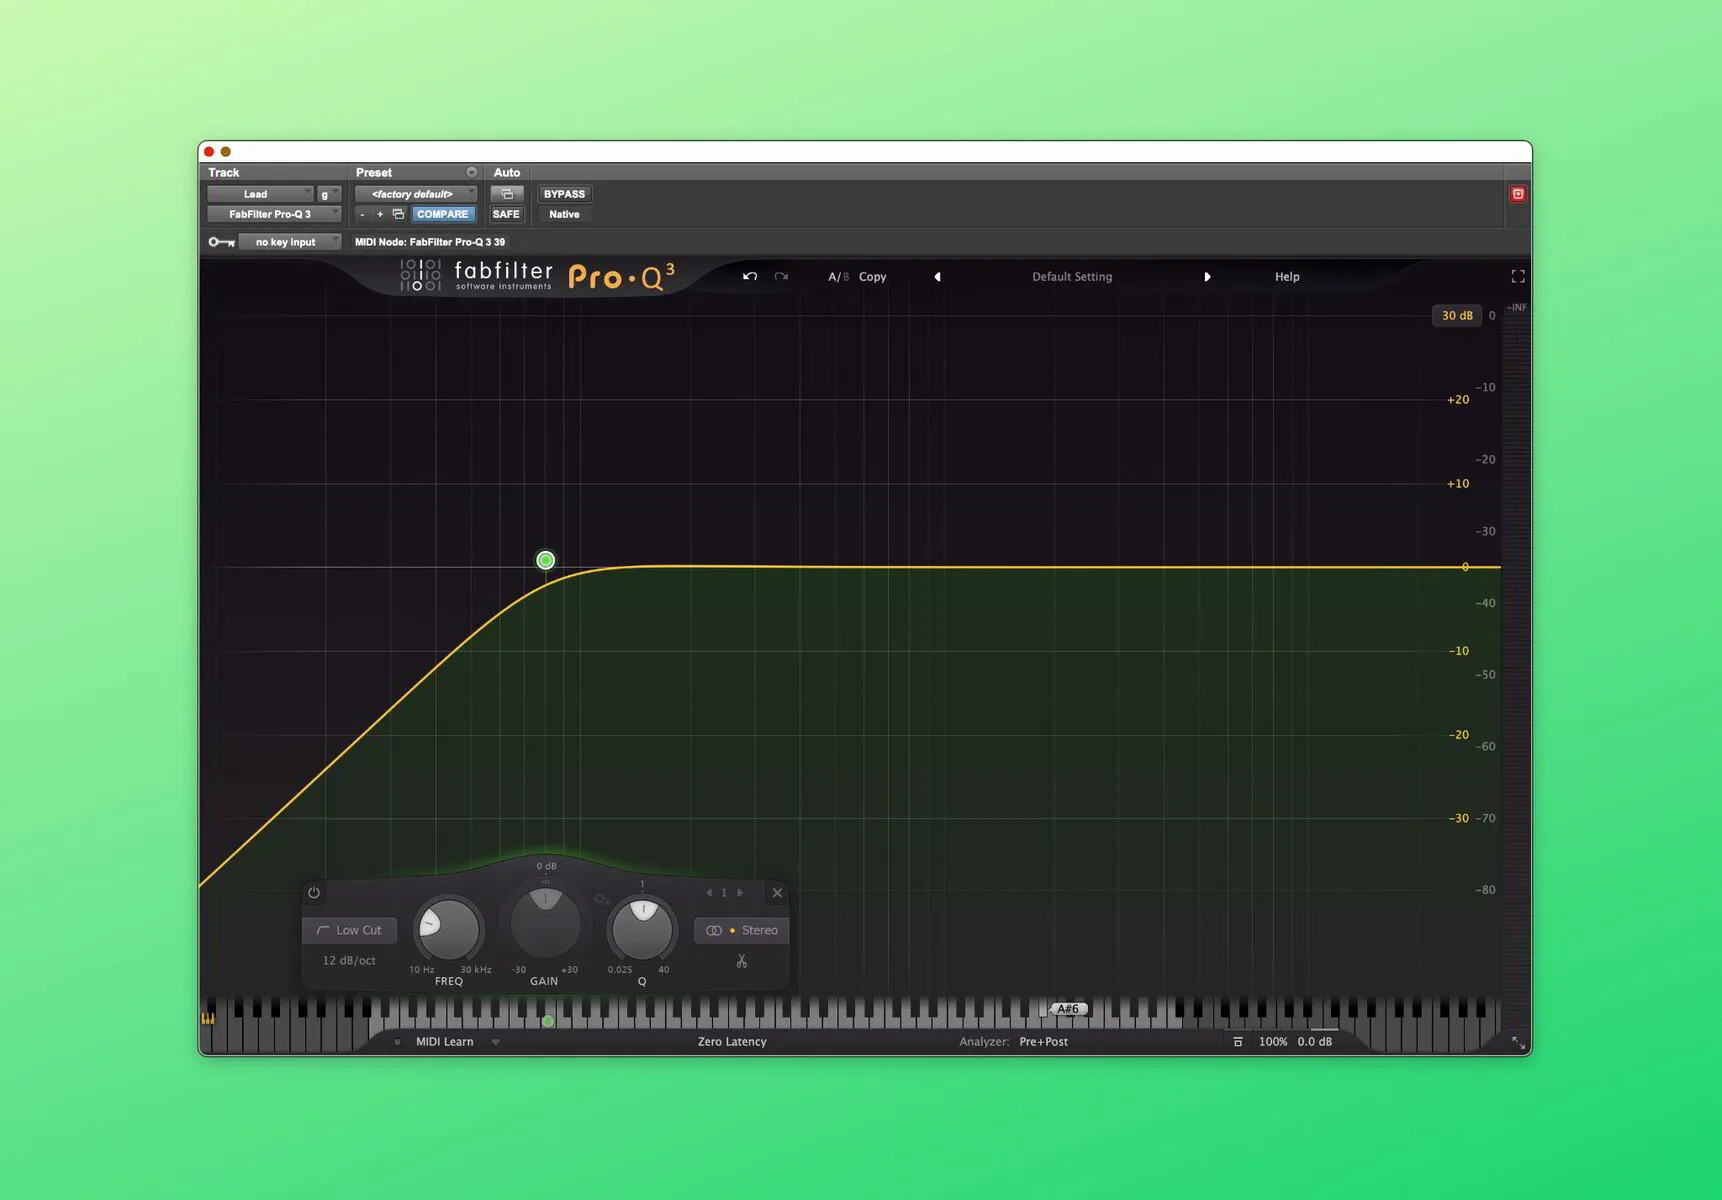
A Pro-Q 3 EQ Rolling Off the Low End
I like to roll the low ends off my vocals. I use a high pass filter around 80Hz, most of the time. With female vocals I might go up a bit further to around 100Hz.
High Pass Filter
80Hz-100Hz
12dB Slope
You roll off the low end first because you don't want this "boomy" noise to be caught by any compressor, causing it to be more apparent. These bass frequencies make your vocals sound unpleasant, and often contain plosives that need to be cut out.
Be careful around this area though, and don't cut out too much. Many unprofessional soudning vocals are caused by cutting out too much of bass frequencies of a vocal. The low end on a vocal has important information (body) that you want to preserve. 80Hz is a general safe area, and if you are unsure you can stick to that.
Step 2: Fix Muddiness
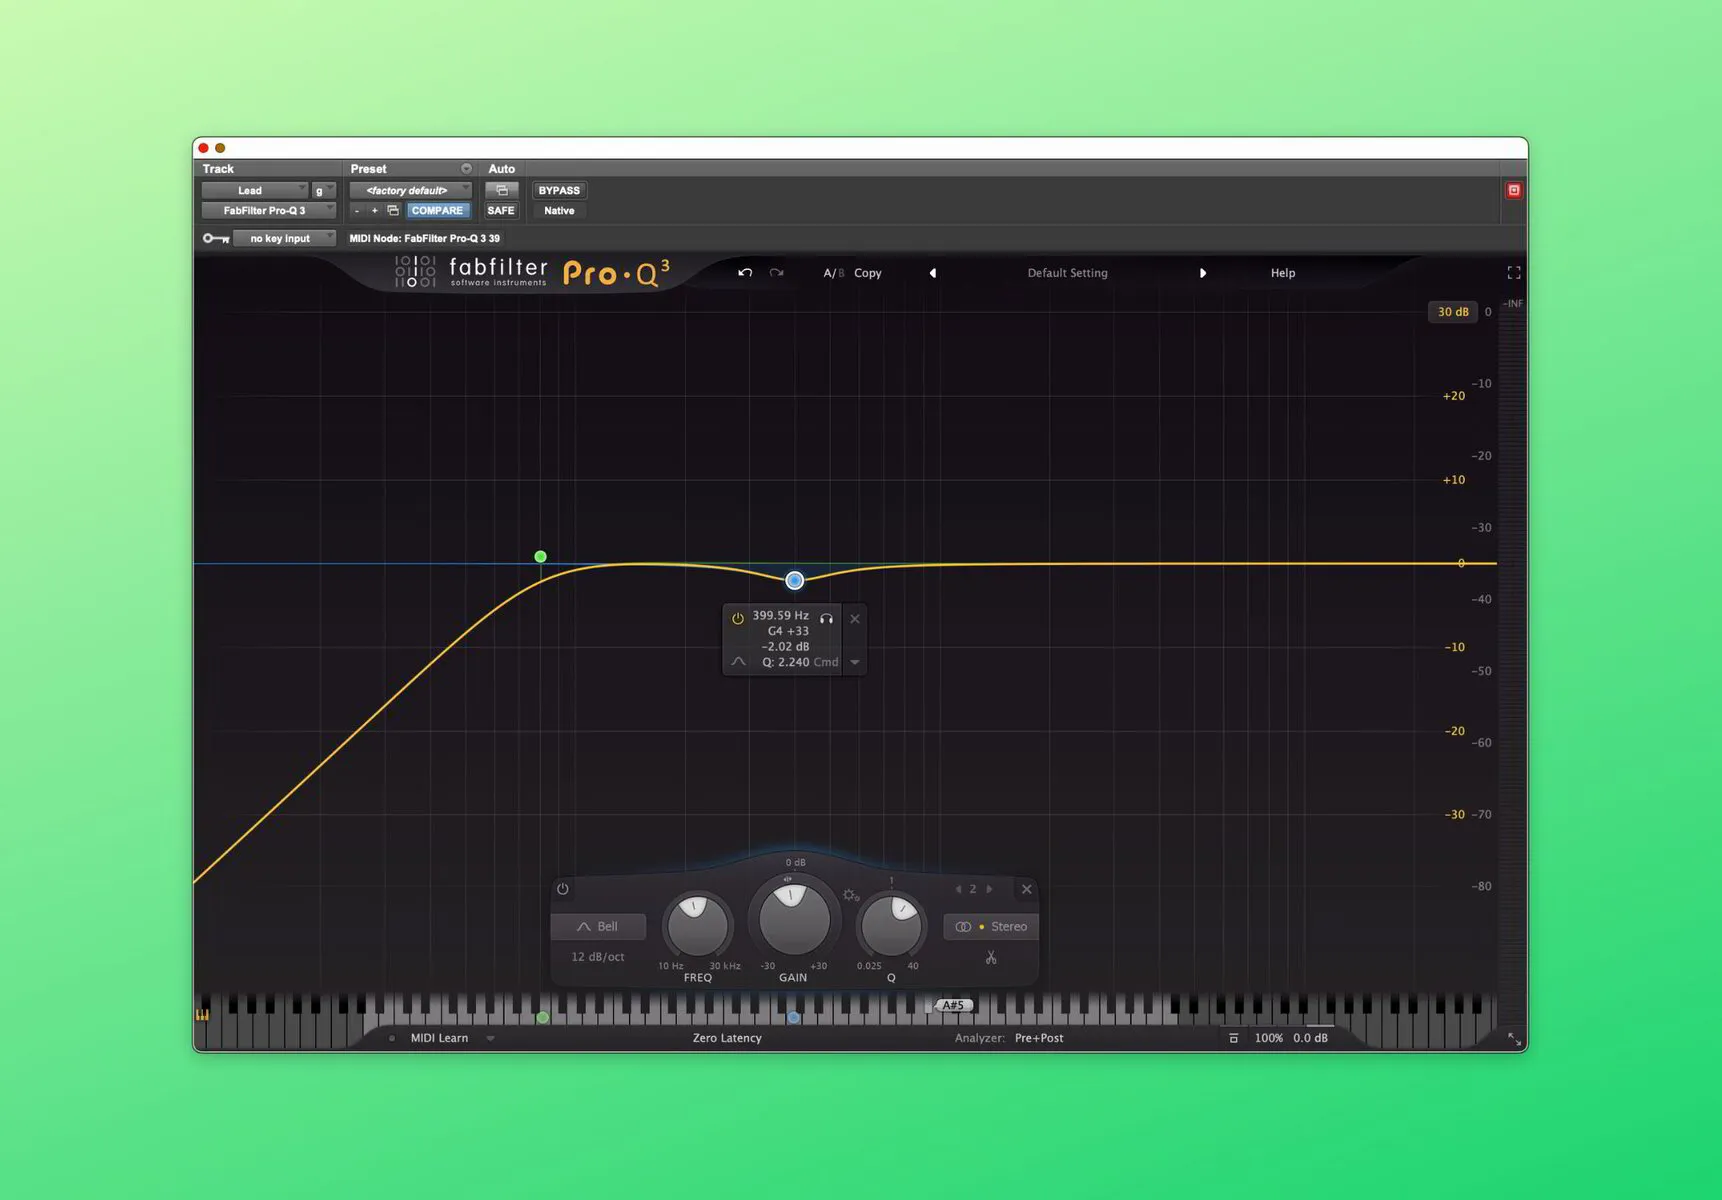
A Pro-Q 3 EQ Cutting Low Muddiness
This frequency range will be one of the most troublesome areas on a vocal. Muddiness in a vocal occurs around 200Hz-500Hz. There are a few ways to combat this are, but the most effective is a bell curve.
Bell Curve
200Hz-500Hz
Around -3dB Cut
I would stay away from always cutting this area. There are still some good frequencies in here that help add body to a sound, like 300Hz. I tend to cut around 350Hz and 400Hz-500Hz.
This can be in two separate cuts or one wide broadband reduction. Use your ears, and determine what sounds best. You may want to "sweep" this area to hear what is causing problems.
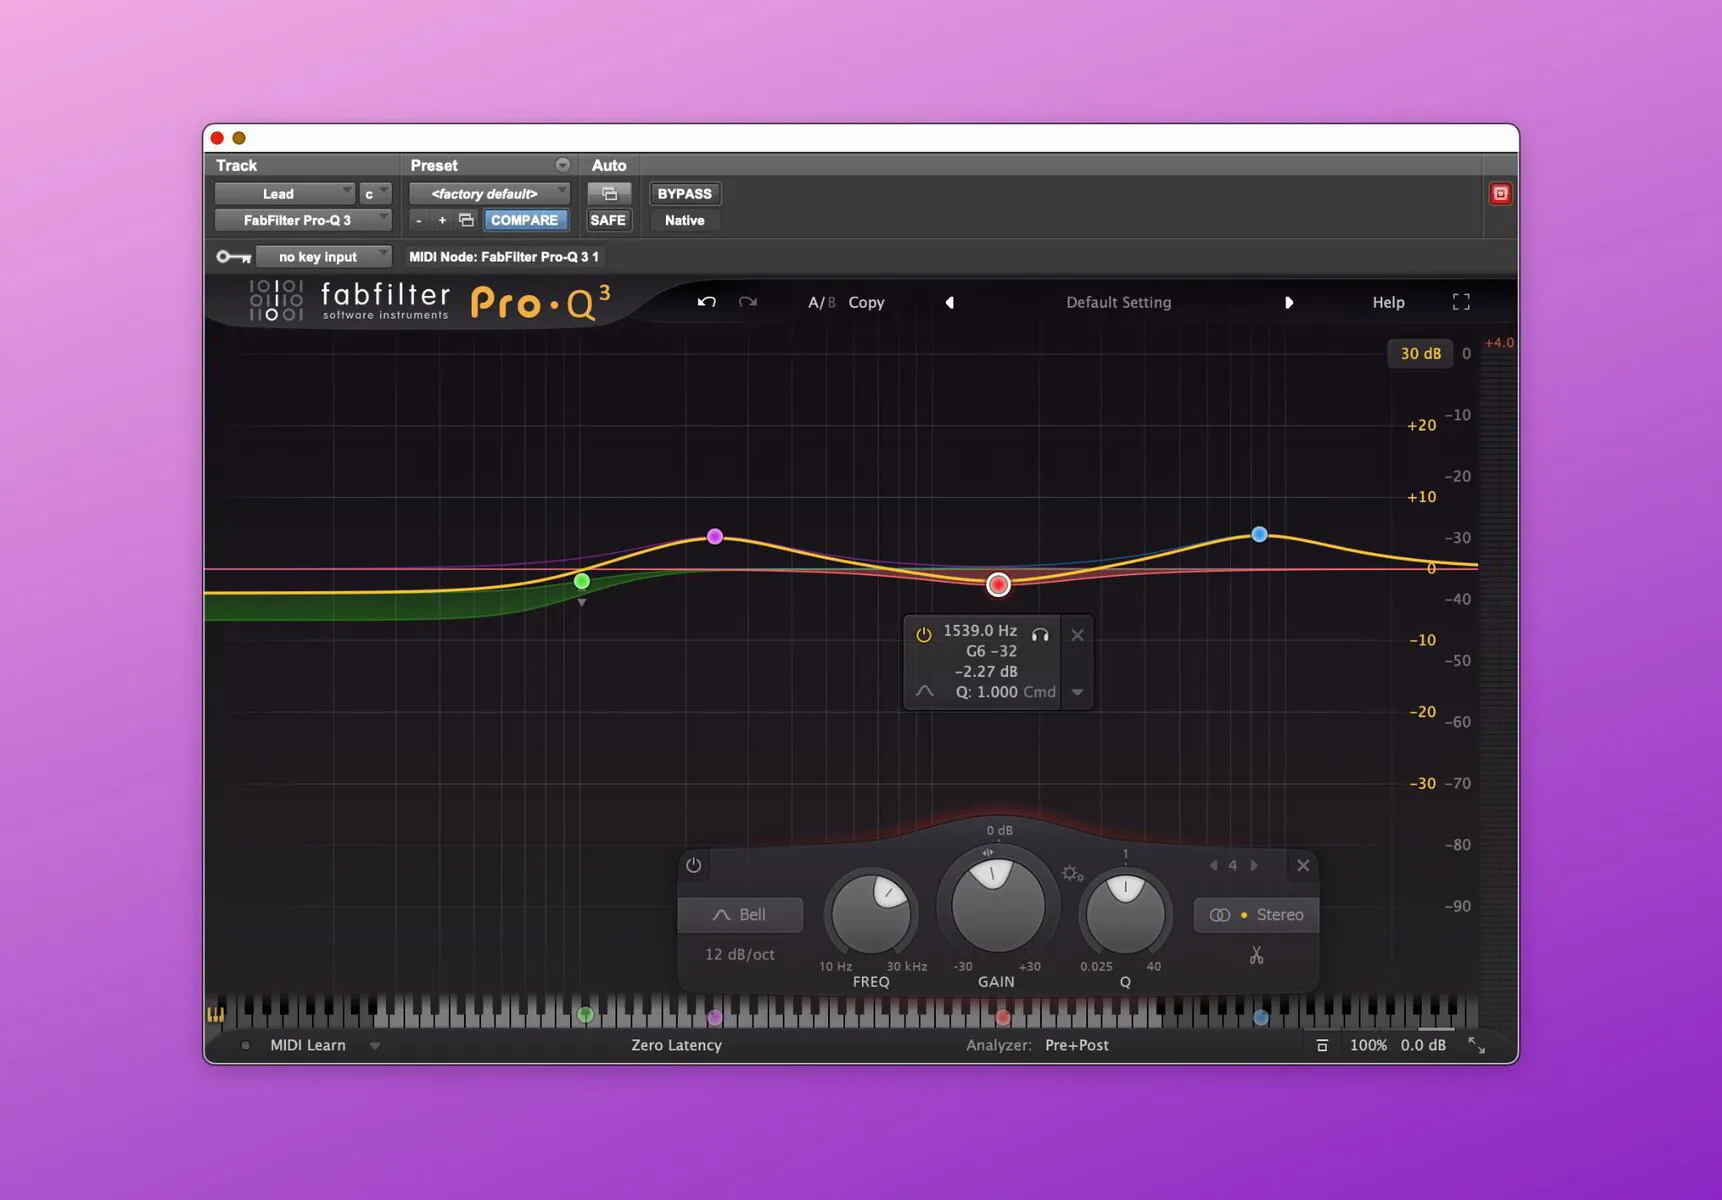
Step 3: EQ the Mid Range
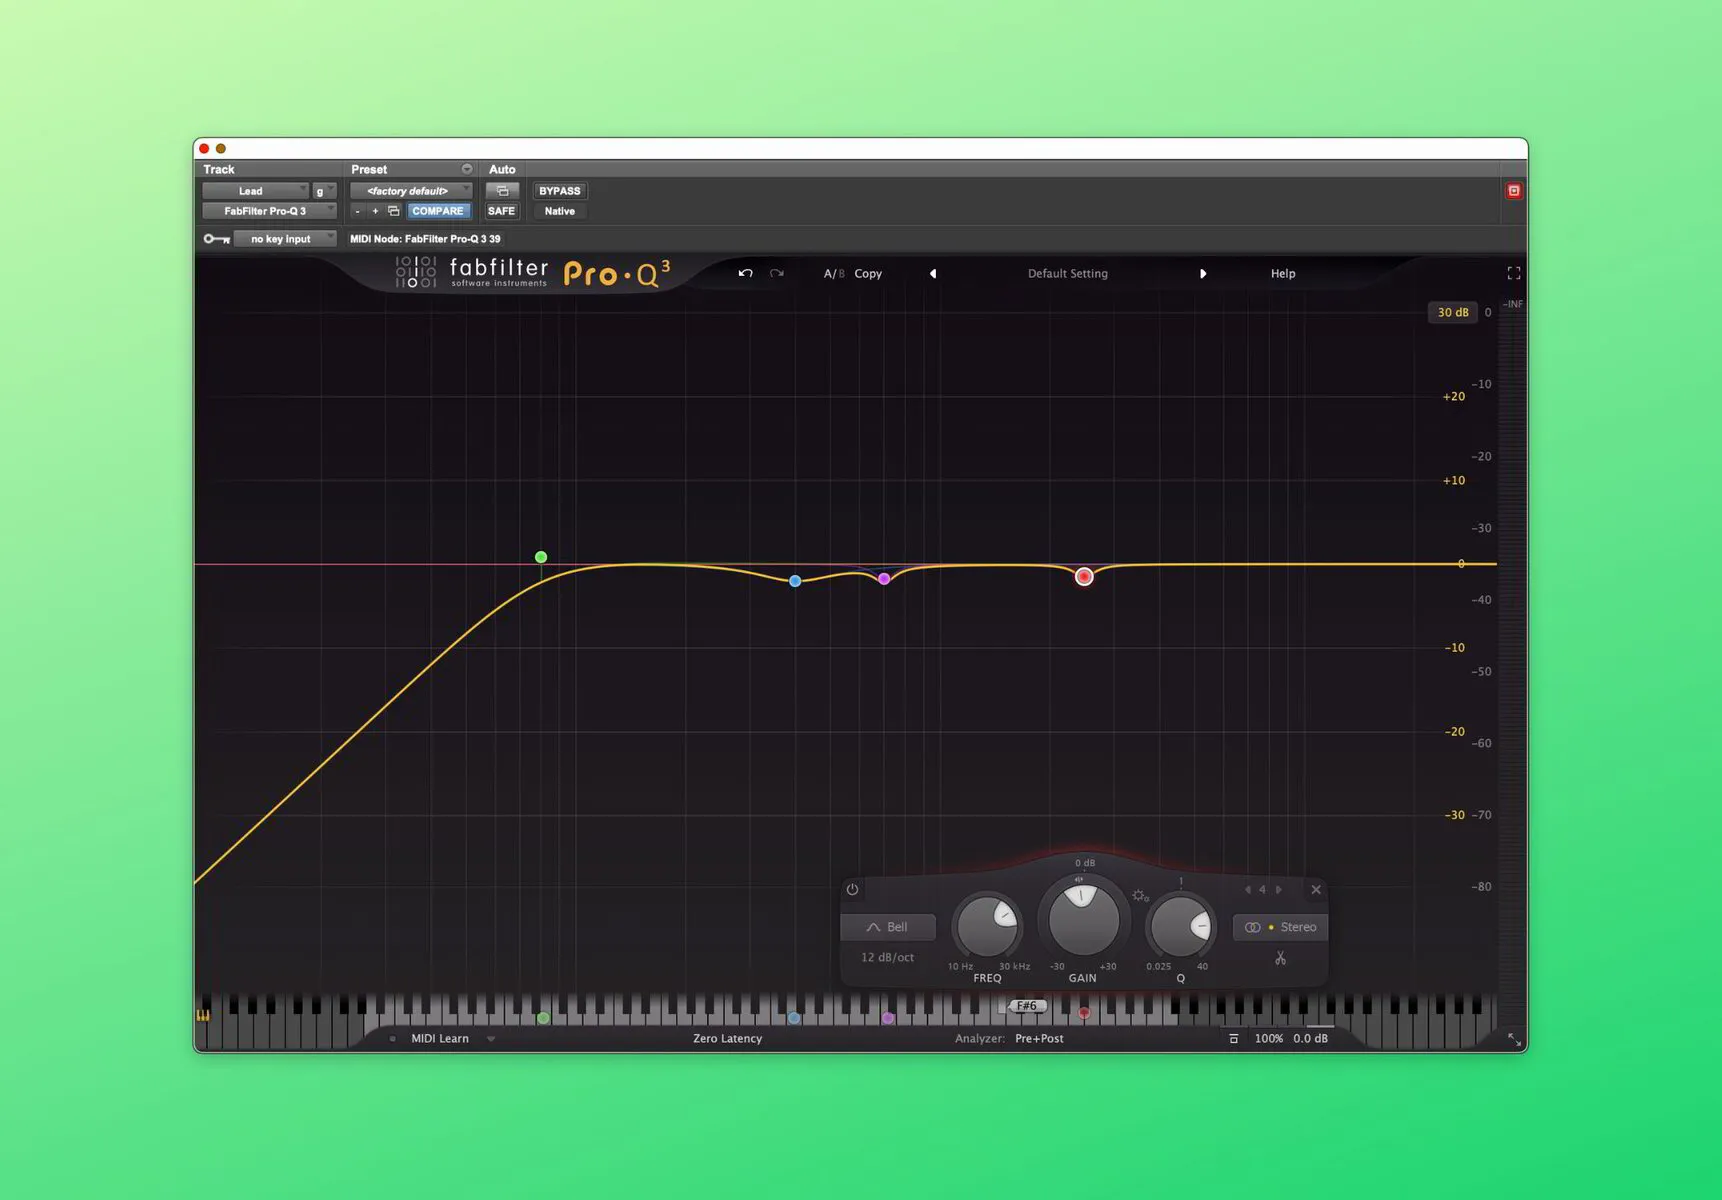
A Pro-Q 3 EQ Lowering the Mid Range Resonant Frequencies
A lot of problem frequencies can be found here. This range will be from 600Hz-2500Hz. I like to sweep this range with a narrow Q, and cutting some of the resonant frequencies (come from the fundamental frequency).
Bell Curve Narrow Q
600Hz-2500Hz
Around -3dB Cut
Resonant frequencies in this range can make your vocal sound unnatural. This area really depends on the type of vocalist, as well as the recording environment. Frequencies I tend to cut a lot are 700Hz, 1500Hz, 2000Hz & 2500Hz.
Cleaning up this area can make your vocals sound more natural, especially if you are doing this after a round of compression.
Step 4: Cleaning Up Harshness
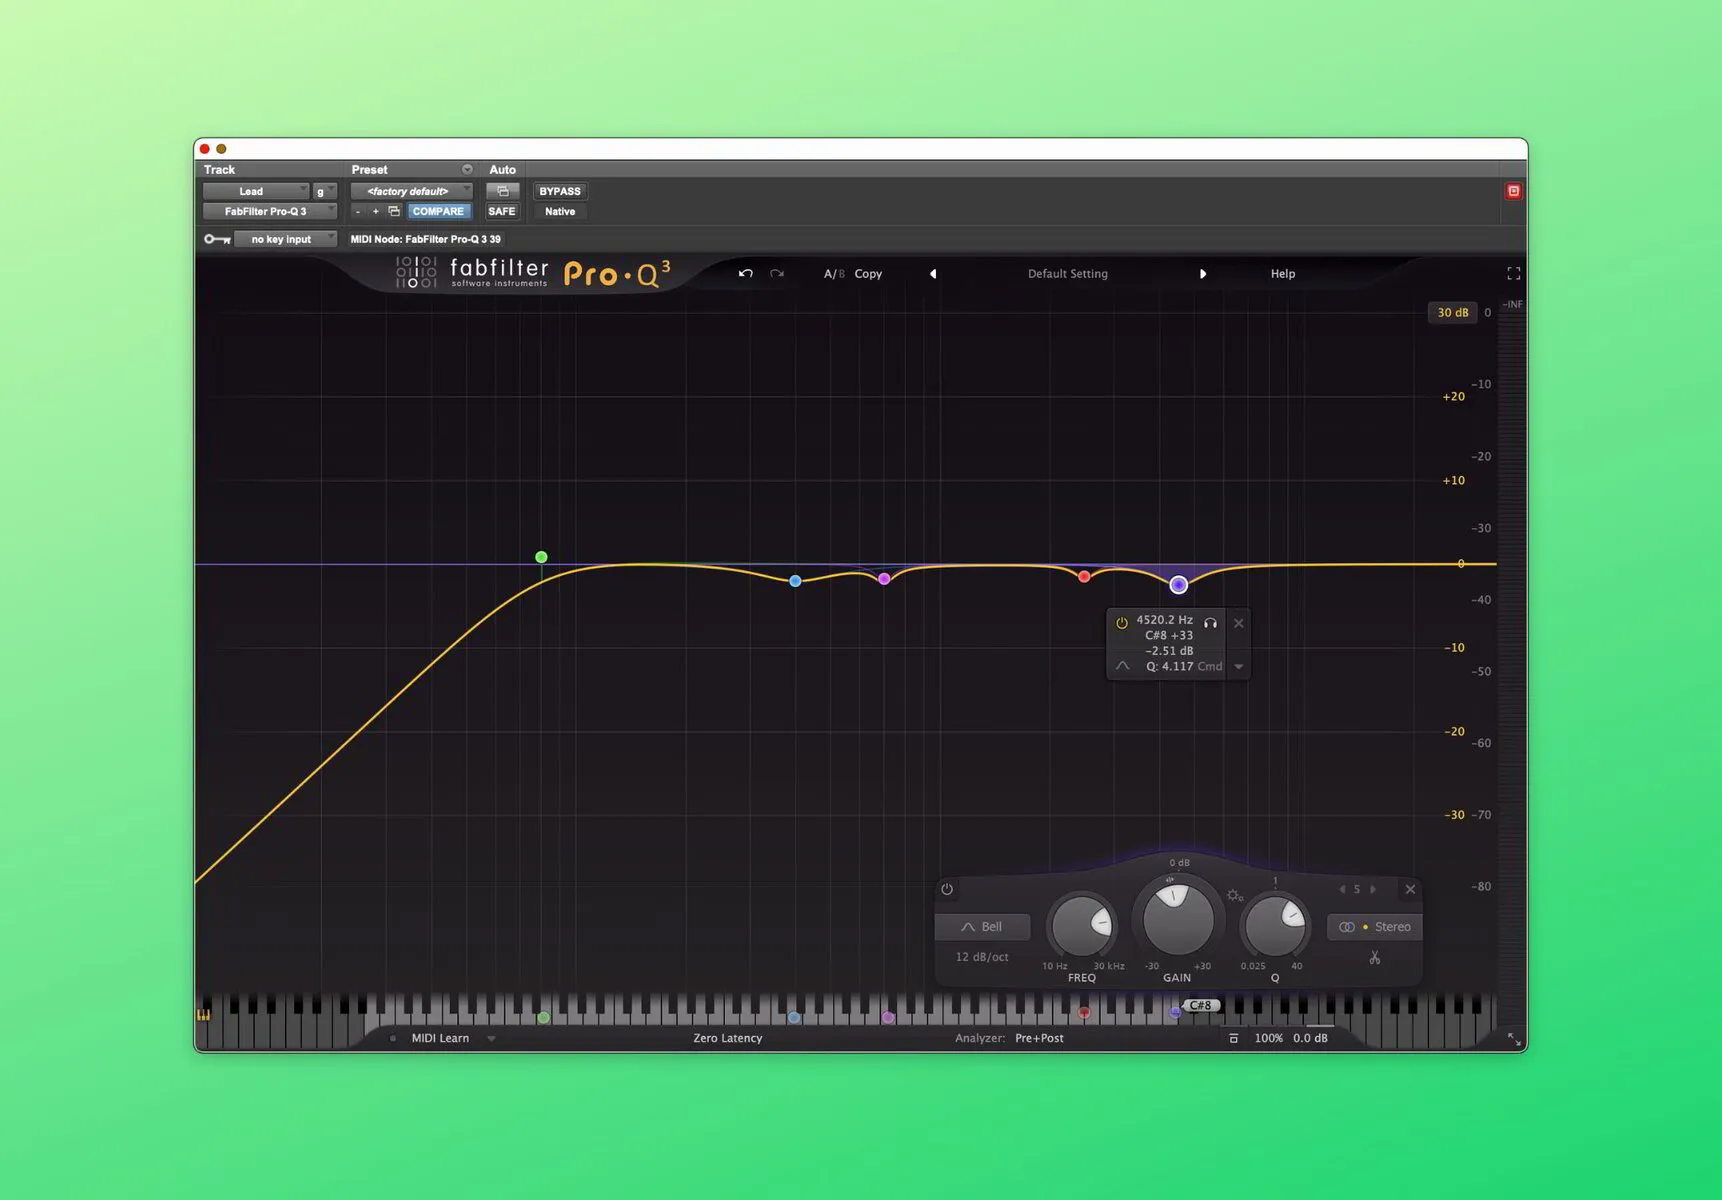
A Pro-Q 3 EQ Cutting Out Harsh Frequencies
This will be one of the most important ranges to deal with. This range will be from 2500Hz-4500Hz.
Bell Curve
2500Hz-4500Hz
Around -3dB
This range is where your vocals sound harsh. It is very important to tame this range, as any piercing frequencies can distract a listener and cause ear fatigue. I find 2600Hz and 4500Hz to be the most unwanted frequencies. I find my self cutting those two areas the most.
Step 5: Boost The Top End
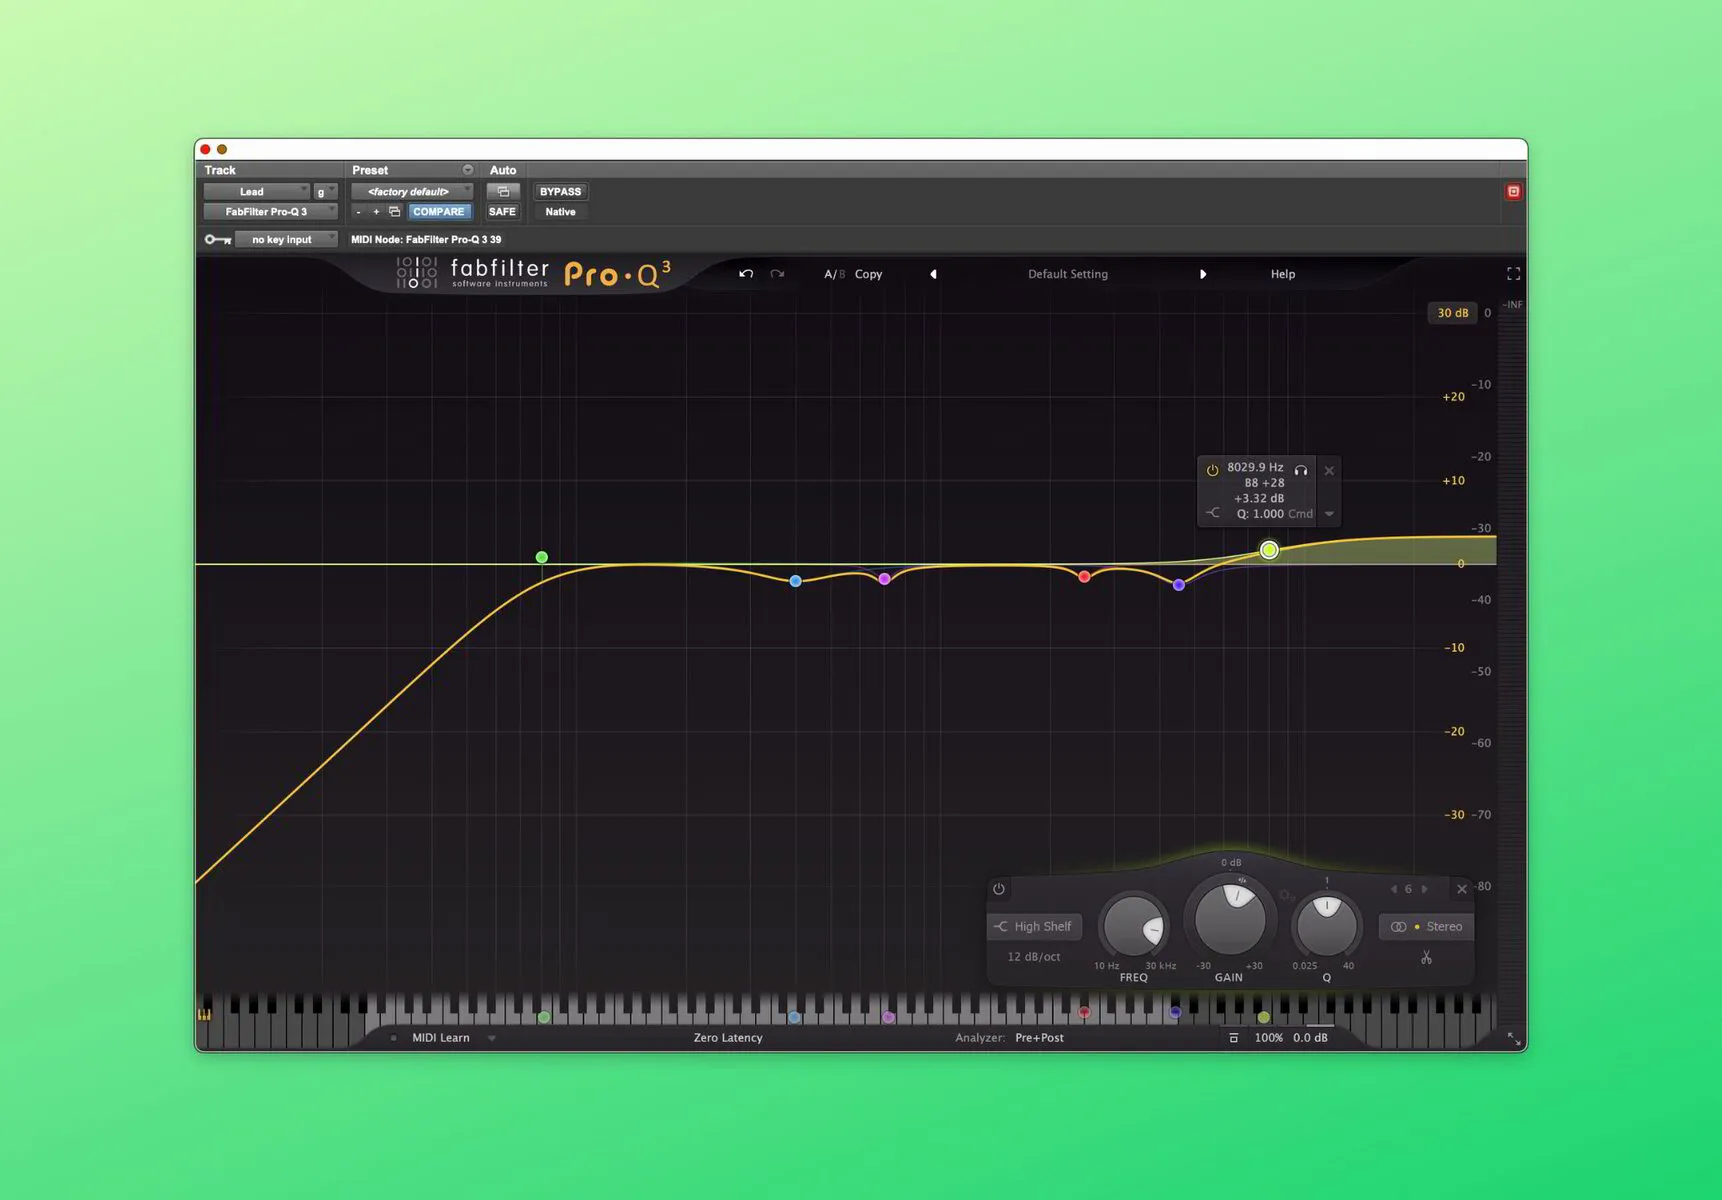
A Pro-Q 3 EQ Adding Top End to a Vocal
If you want a bright and up front vocal, you will need to add some top end. This range can be from 5000Hz to 40,000Hz.
High Shelf
5000Hz-40,000Hz
+3dB - +6dB
Vocals don't naturally have this top end that is needed to bring a vocal forward. Especially if recorded in a poor recording environment. When you are EQing, remember that reducing top end will put your sound more in the back of a mix, and raising the top end will bring it forward.
I like to boost 5000Hz, 8000Hz or around 12000Hz. This depends on the vocalist and the song.
This range is extended and goes all the way up to 40,000Hz because I will use different EQ's when boosting frequencies here. Although you can't technically hear this range, adding a boost up there can really open up a vocal, without adding any harshness. Going over some of the plugins I like to use below will include some of these options.
Sweeping: Finding the Frequencies to Cut or Boost
These steps above are just starting points. there are going to be times you don't do anything to these frequencies or you may need to EQ different areas. Again, it all depends on your vocalist and your recording environment. EQing vocals is also dependant on the instrumental and beat mix.
The best way to find what you need to EQ in a vocal is sweeping. Say you hear a frequency you don't like, and it is clashing with the composition, you can increase a EQ bands volume to exagerate and find that problem frequency. This is called sweeping.
You will still need to be critically listening to the song. Don't just sweep and cut or boost based on the increase in volume. Just because a sound is harsh when you increase it 10+dB, doesn't mean it is bad in general. Use your ears and AB test frequently.
Another thing that can help is a vocal EQ cheat sheet. You can check out our EQ cheat sheet here, and se what instruments clash with your vocal of choice.
These are the best plugins to use to learn how to eq vocal tracks.
Fabfilter Pro-Q 3
Fabfilter Pro-Q 3
Fabfilter Pro-Q3 is my favourite plugin to use to EQ vocals with. It is nearly limitless in it's capabilities. The amount of bands you can use, the work flow, dynamic bands, and their frequency spectrum analyzer are all top notch.
The Pro-Q3 is one of the easiest parametric eq plugins for beginners to use. It is very transparent and has a phenomenal UI.
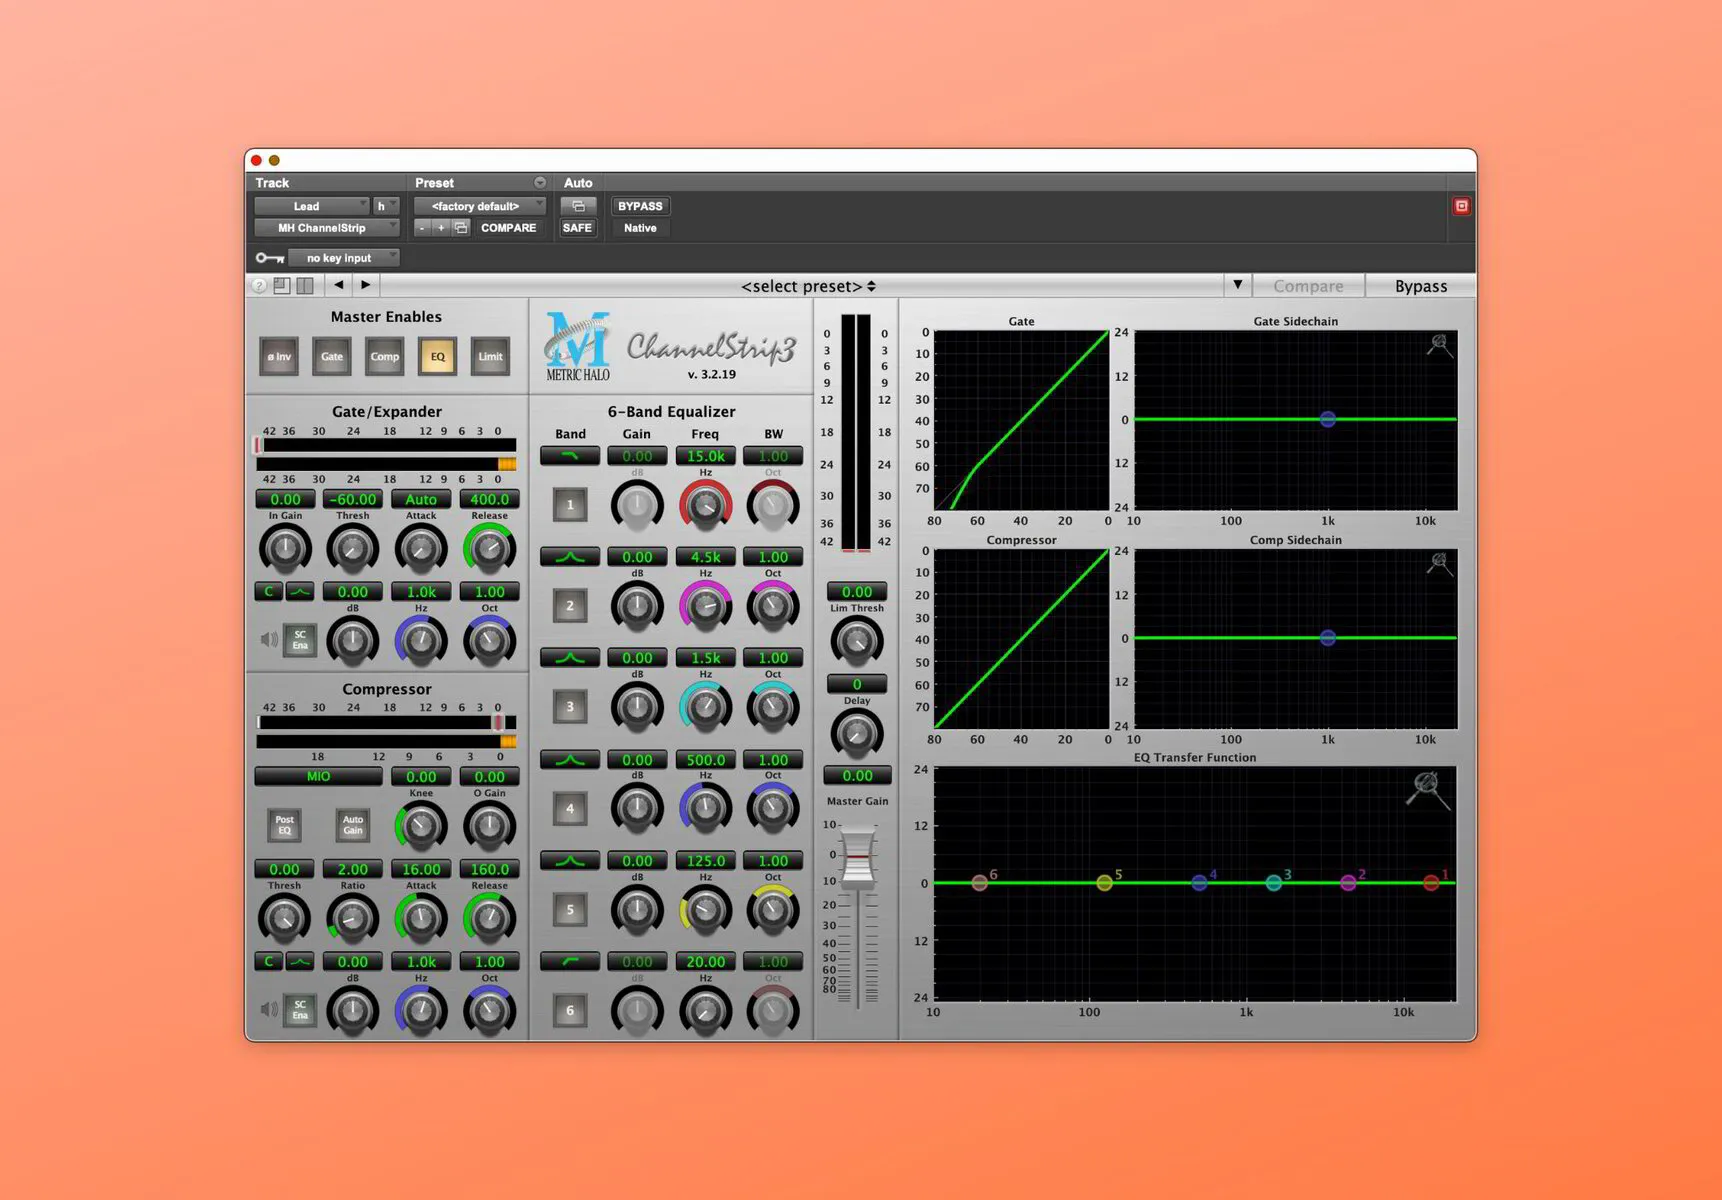
Metric Halo Channel Strip
Metric Halo Channel Strip 3
The Metric Halo Channel strip is a great plugin for vocals. It has the most replicable SSL sound of any plugin I have used. It also has more flexibility compared to other SSL plugins. This is one of the most reliable plugins I have found when working on vocals. This I picked this up I have used it on every single song I have mixed.
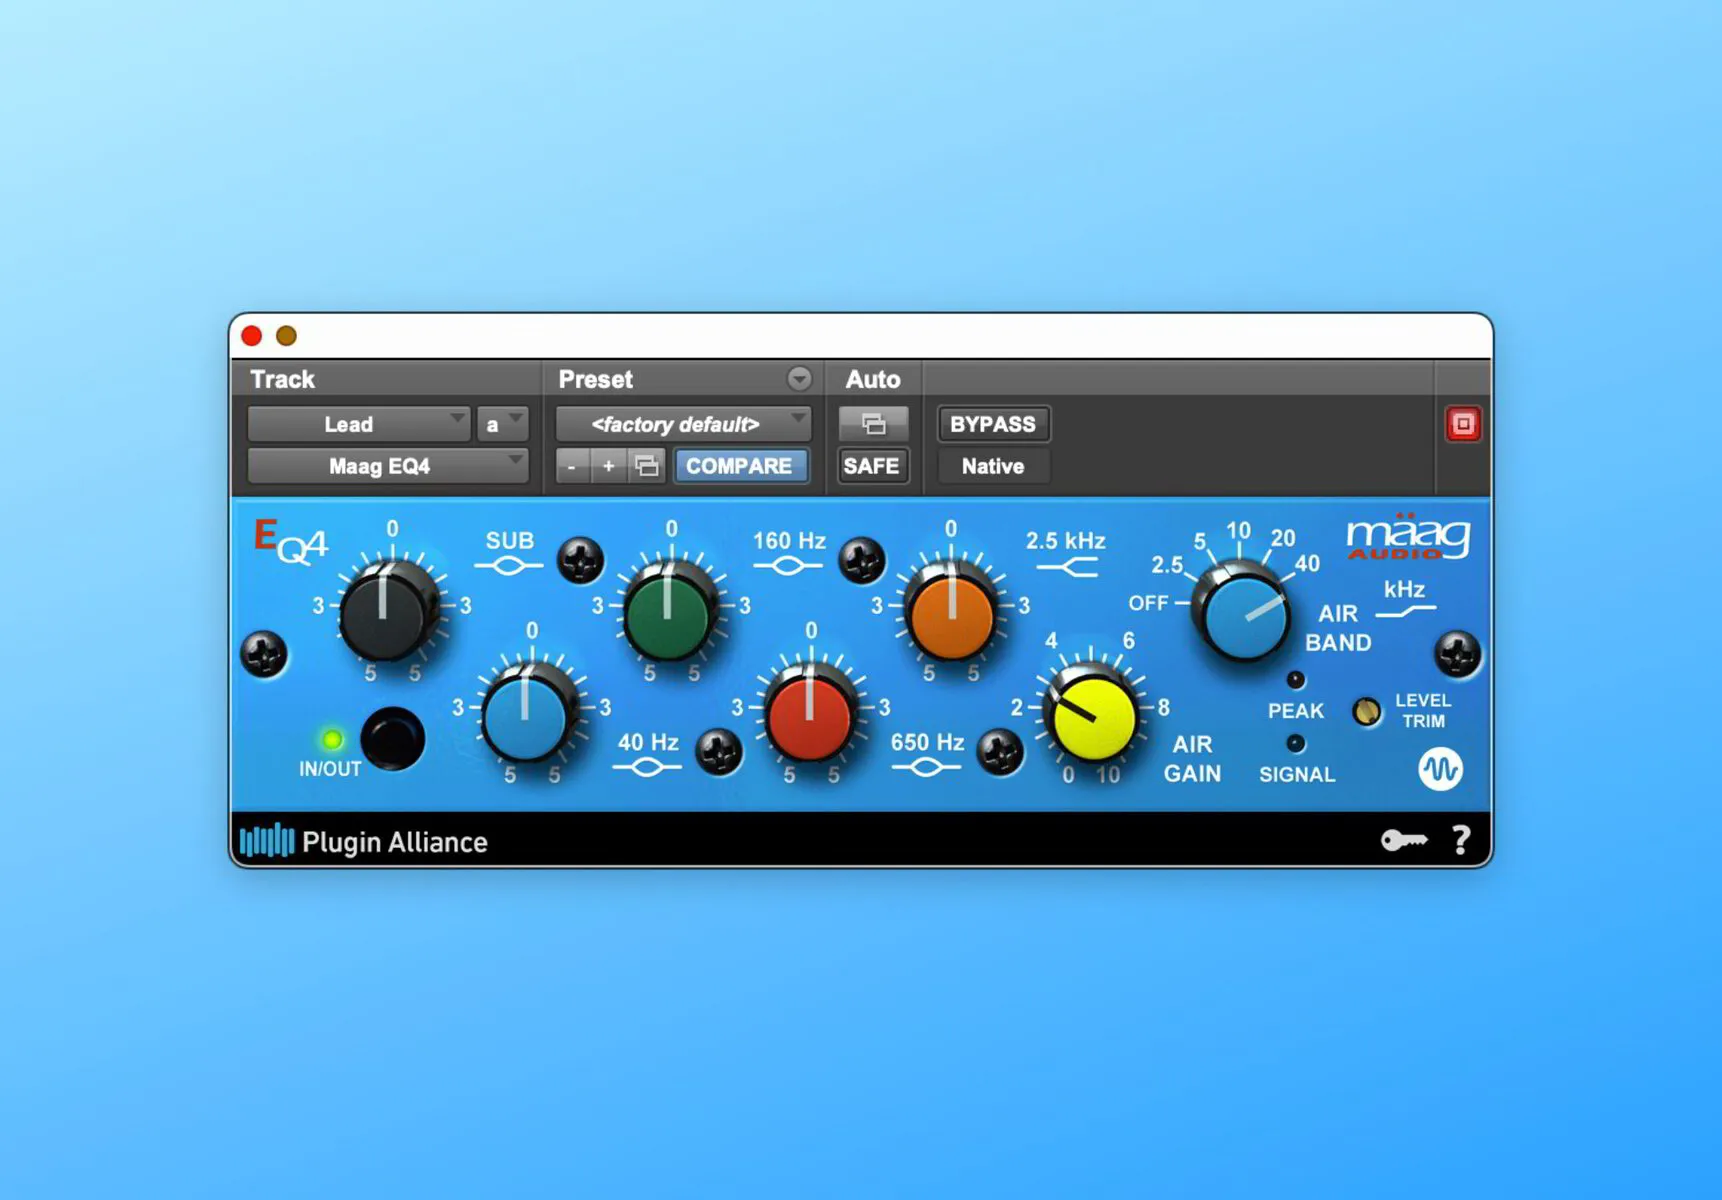
Maag EQ
Plugin Alliance Maag EQ4
This is my go-to EQ for adding brightness to a vocal. The Maag eq4 has brightness options from 2500Hz all the way up to 40,000Hz and they all sound great on a vocal. I often boost around 3dB all the way up to 6dB without adding any extra harshness.
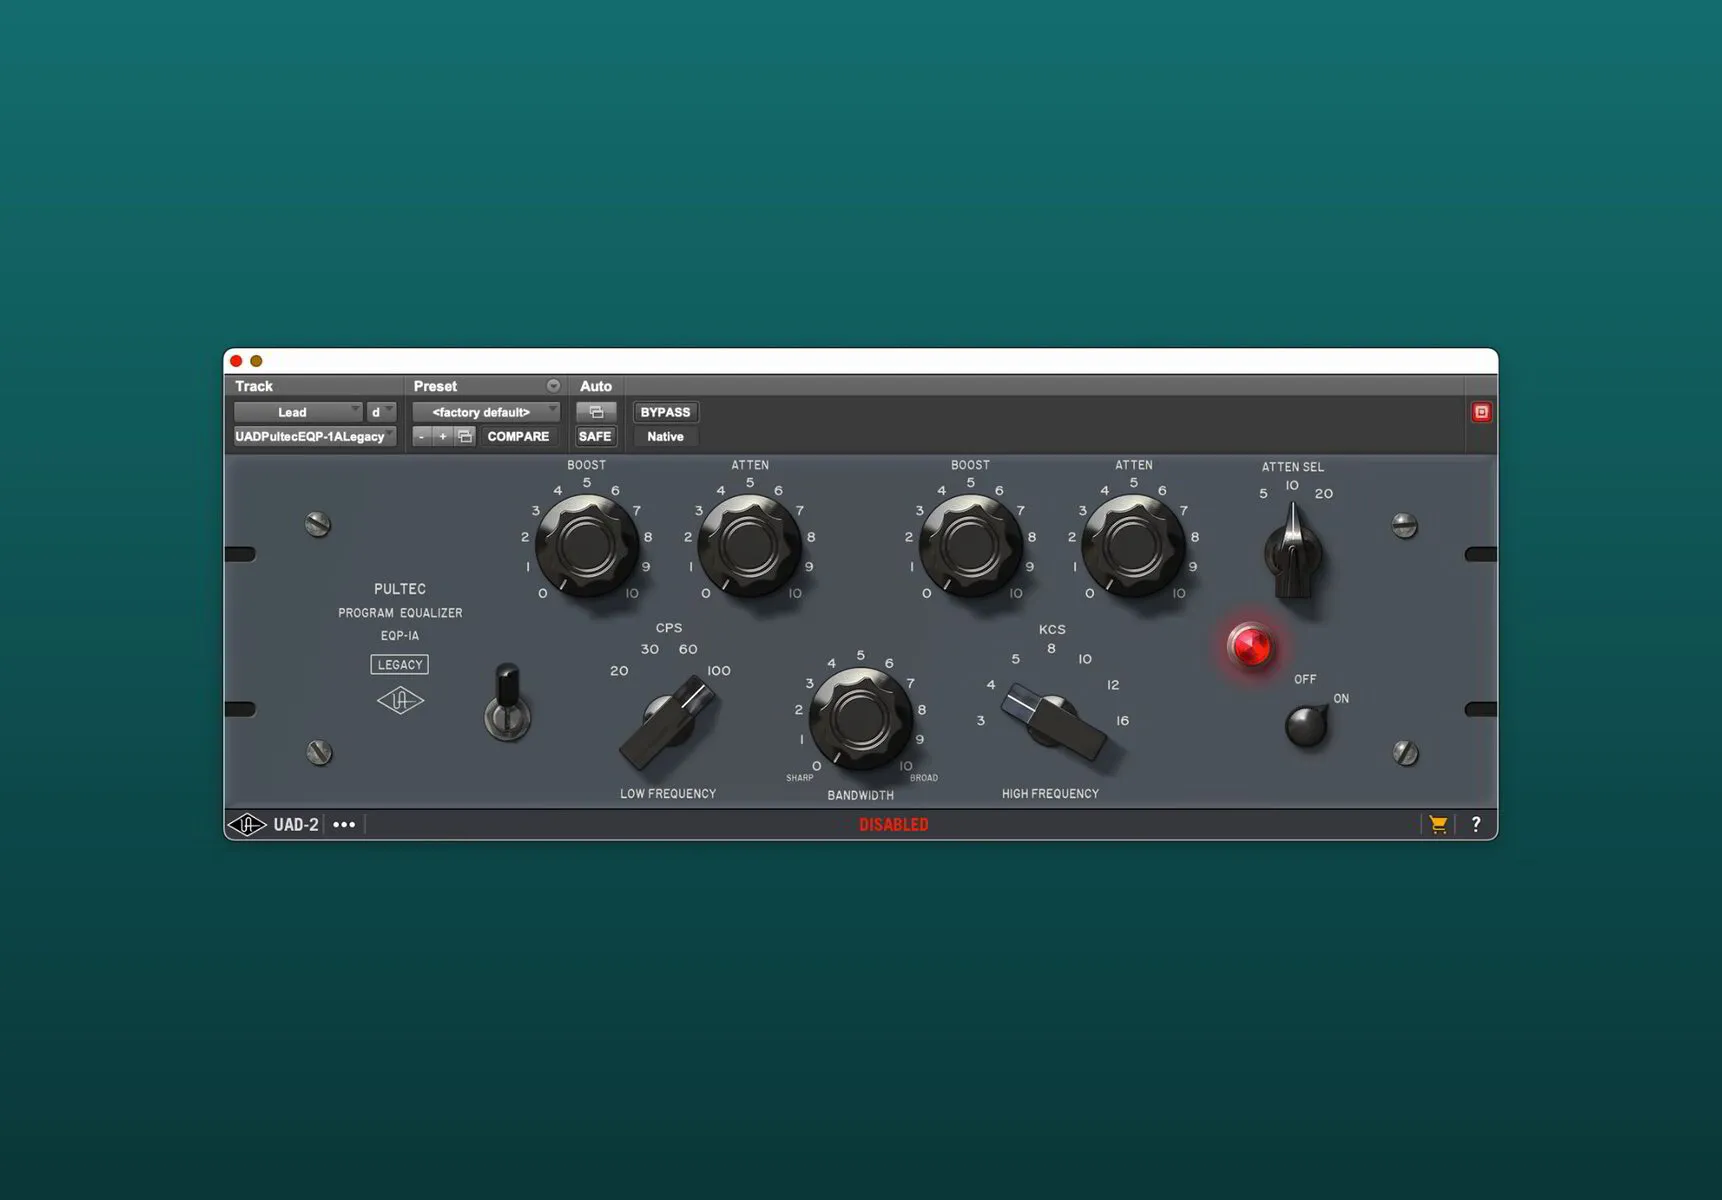
Pultec
UAD Pultec Plugin
Pultec EQ's have some of the best sounding harmonics and color. You can often times just run sounds through a Pultec and it will sound better. This EQ is great for cutting or boosting low end, or even adding some top end to a vocal.
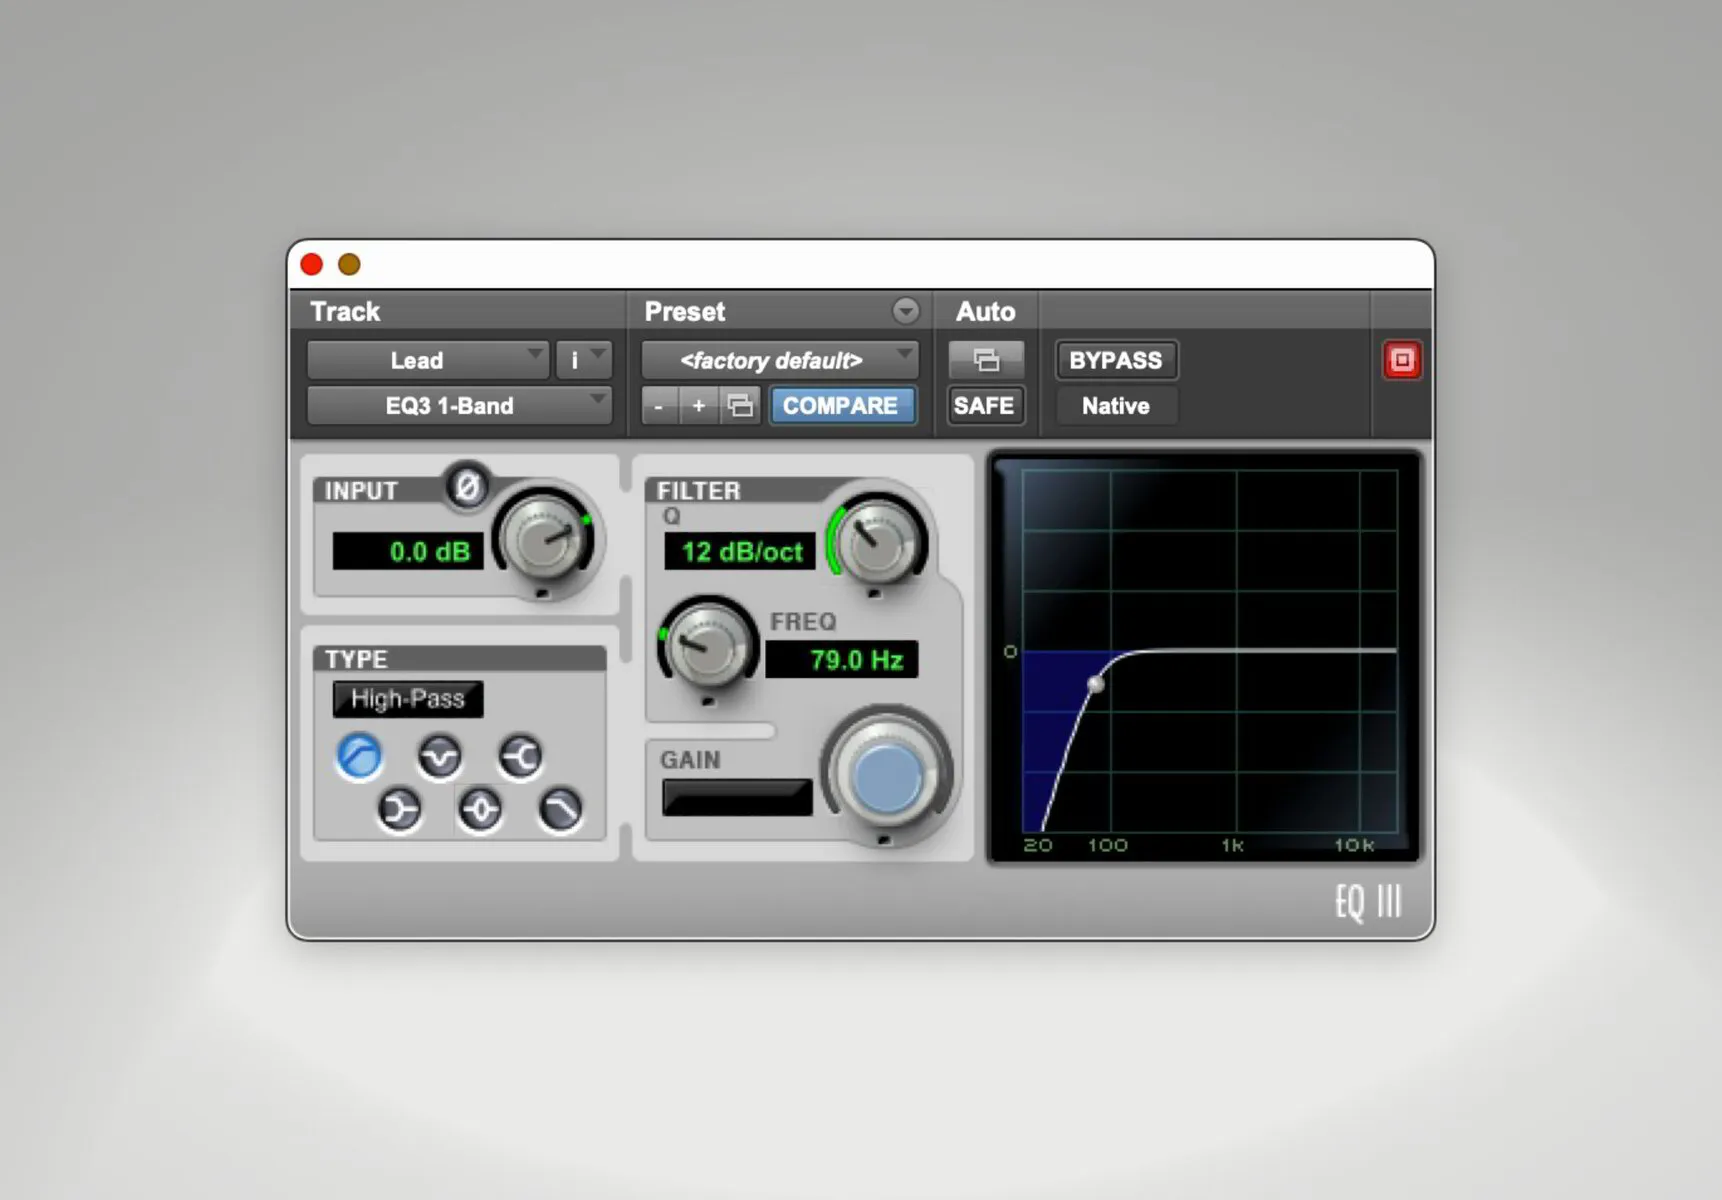
EQIII
Avid EQ 3
The EQ3 is a stock pro tools EQ plugin, but it works great. I use this EQ the most when I am rolling off the low end of a vocal. It is very transparent and has a single band option that I like to use. It is reliable.
Conclusion
That is how I EQ vocals professionally. Always be using your ears and do not do things for the sake of them. This step by step guide is just a guideline. I do not use all these boosts and cuts in every song I mix. I try to use as little EQ as possible these days as I find it can lead to vocals sounding unatural if overdone.
EQing vocals may seem complicated at first,but working on more and more songs with these steps included will help. Go from range to range, and tackle all problem frequencies, then boost what is needed. Pick the right EQ plugins for the job and setting up your vocal chain. Methodically sweep through the frequency spectrum, making strategic boosts and cuts to remove muddiness, harshness, and conflicts with other instruments and you will have a pro vocal!
Want to learn more about mixing vocals? Check our post out below about compressing and EQing vocals: